Stuffed Burgers

I haven’t met too many people who don’t like a good hamburger from time to time. These days it seems like a lot of restaurants are trying all sorts of new ways to re-invent the burger and offer up lots of different toppings to suit even the pickiest of eaters. Two of the best burgers I have ever eaten were at the B & B Joint in Miami, Florida. Oh my goodness! My husband and I were there in 2011 celebrating our wedding anniversary on Surfside Beach. We tried the Hotel California and the Mustang Sally burgers and we split them so we could share. It was the first time I had ever had a sunny side up egg on my burger and it was AMAZING. If you like eggs and have never tried one on a burger, your missing out, for sure!

We also have a slight addiction to the show Diners, Drive-ins and Dives on the Food Network. Man, I could watch that show all day, except that it makes me so hungry. One night we were watching and saw a burger joint that made stuffed burgers. We just looked at each other and knew that we just had to try that. I mean, it makes total sense to load up the middle of a burger with all of your favorites.

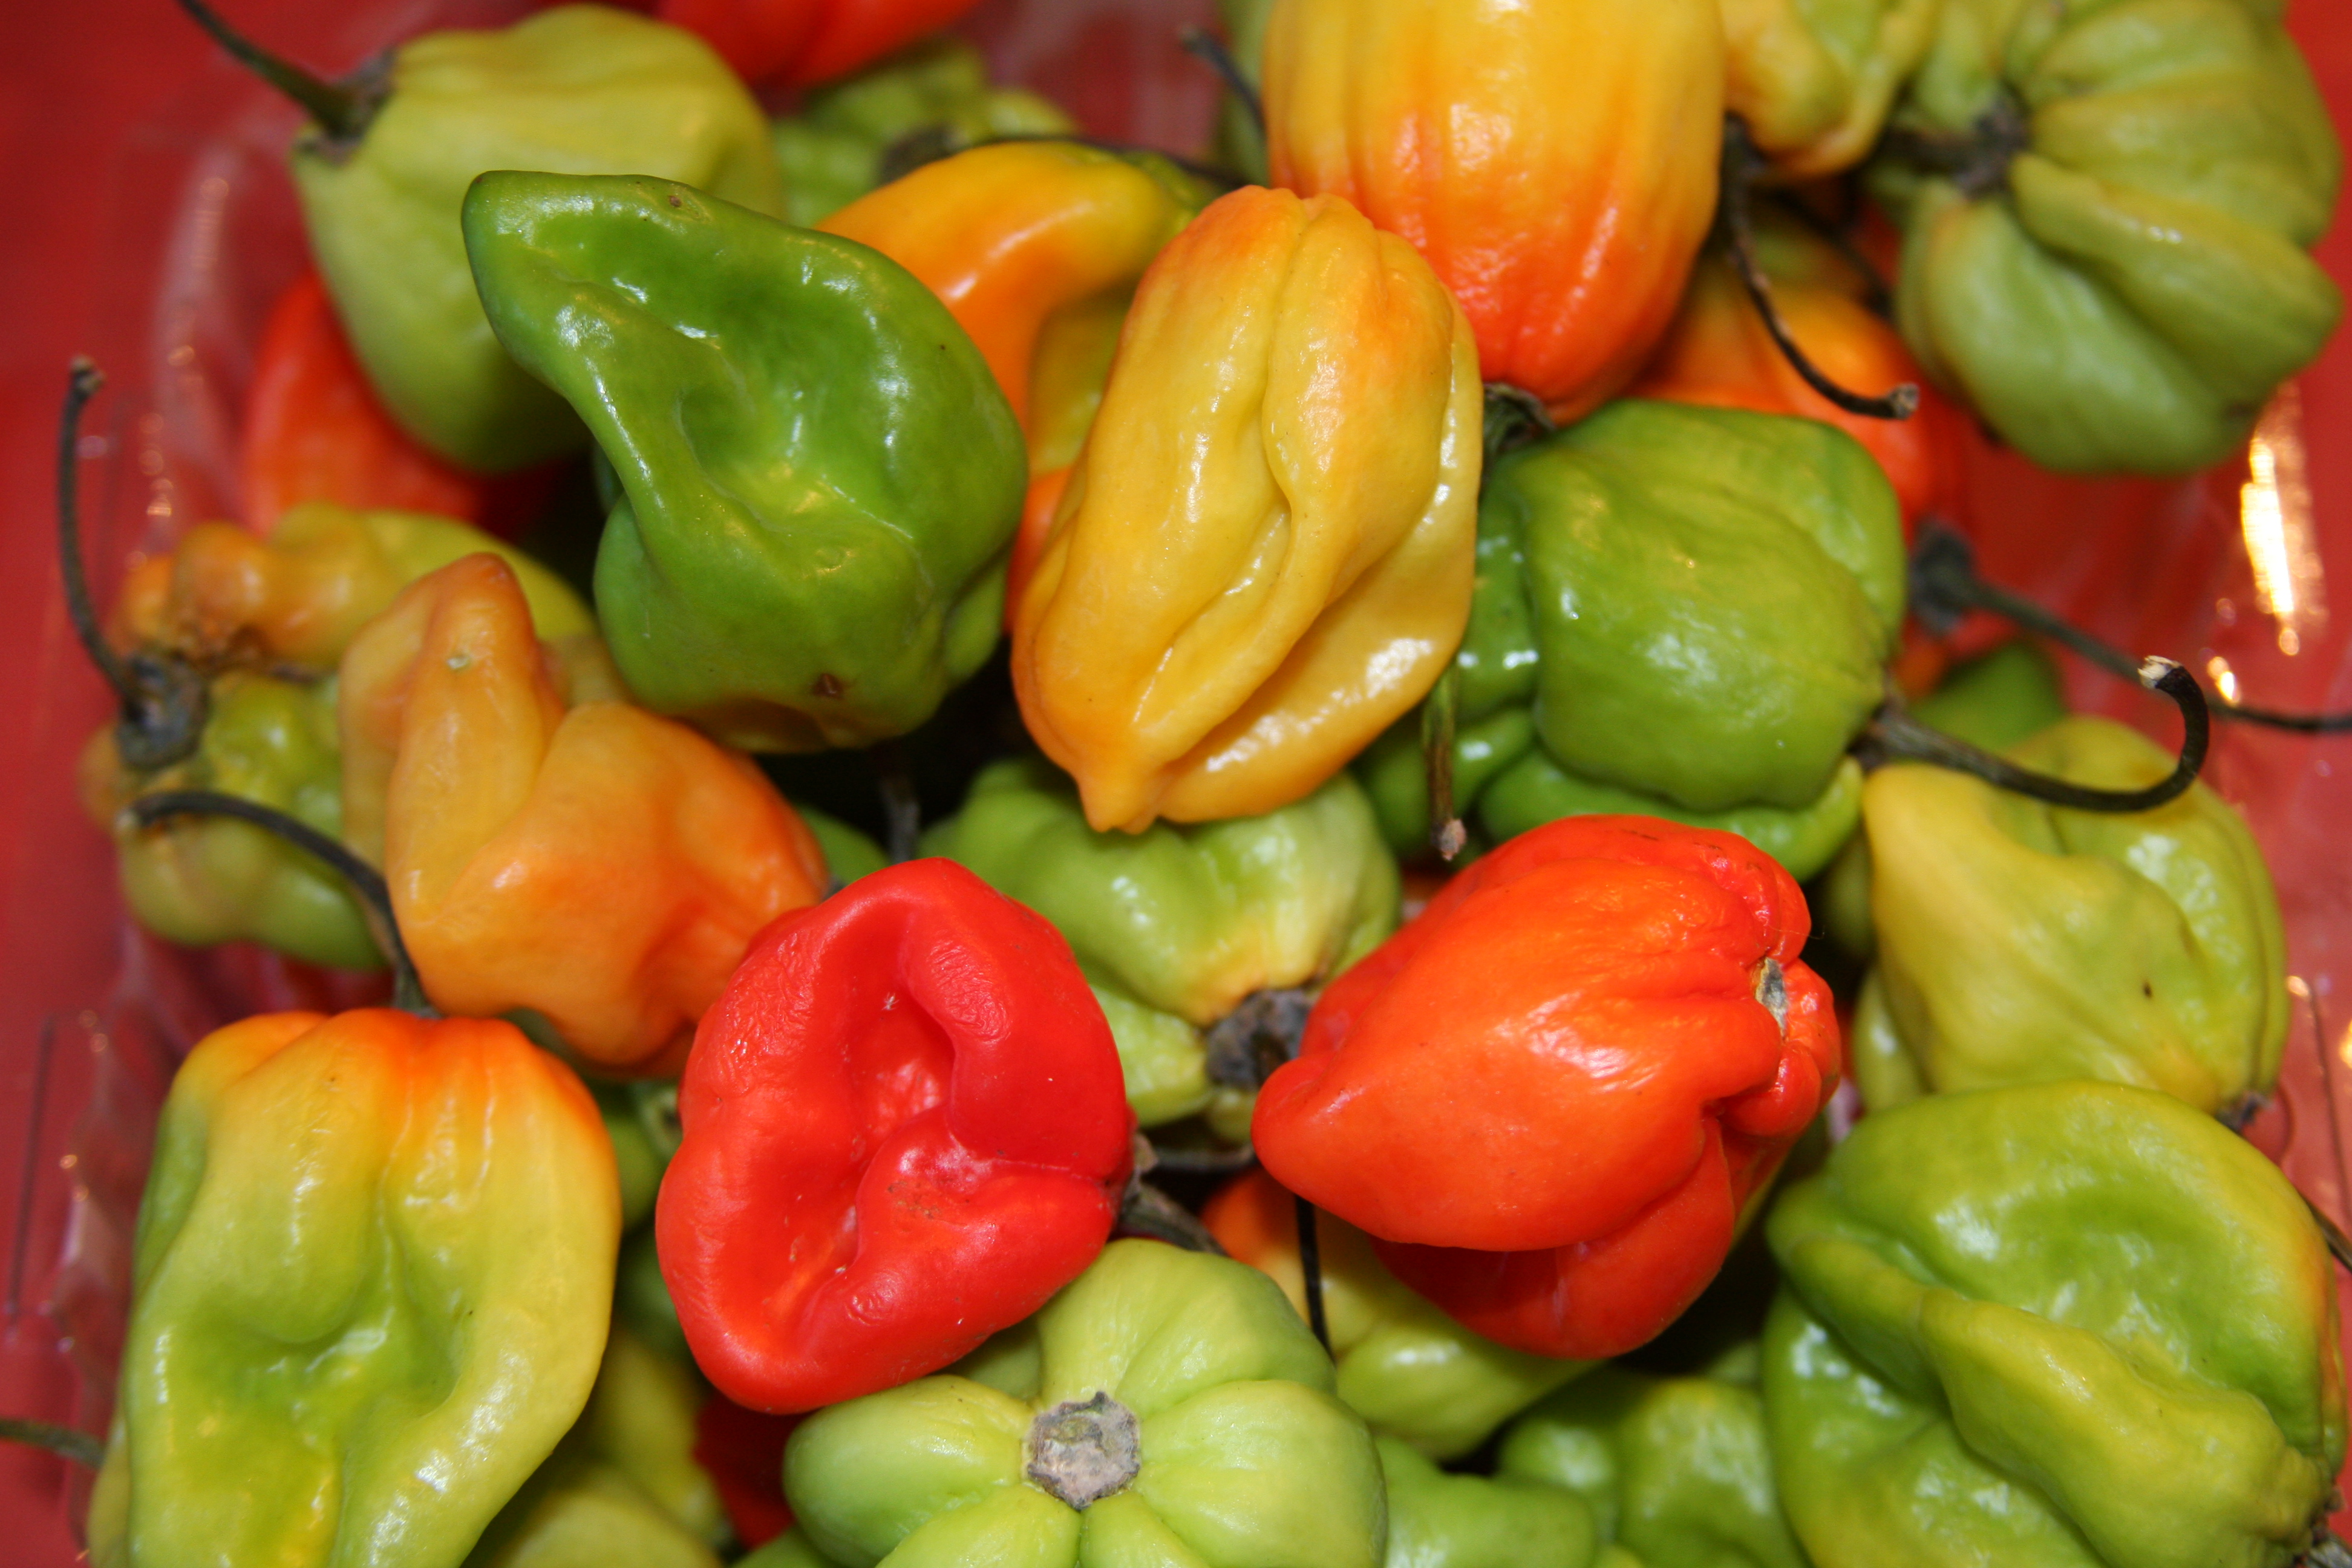
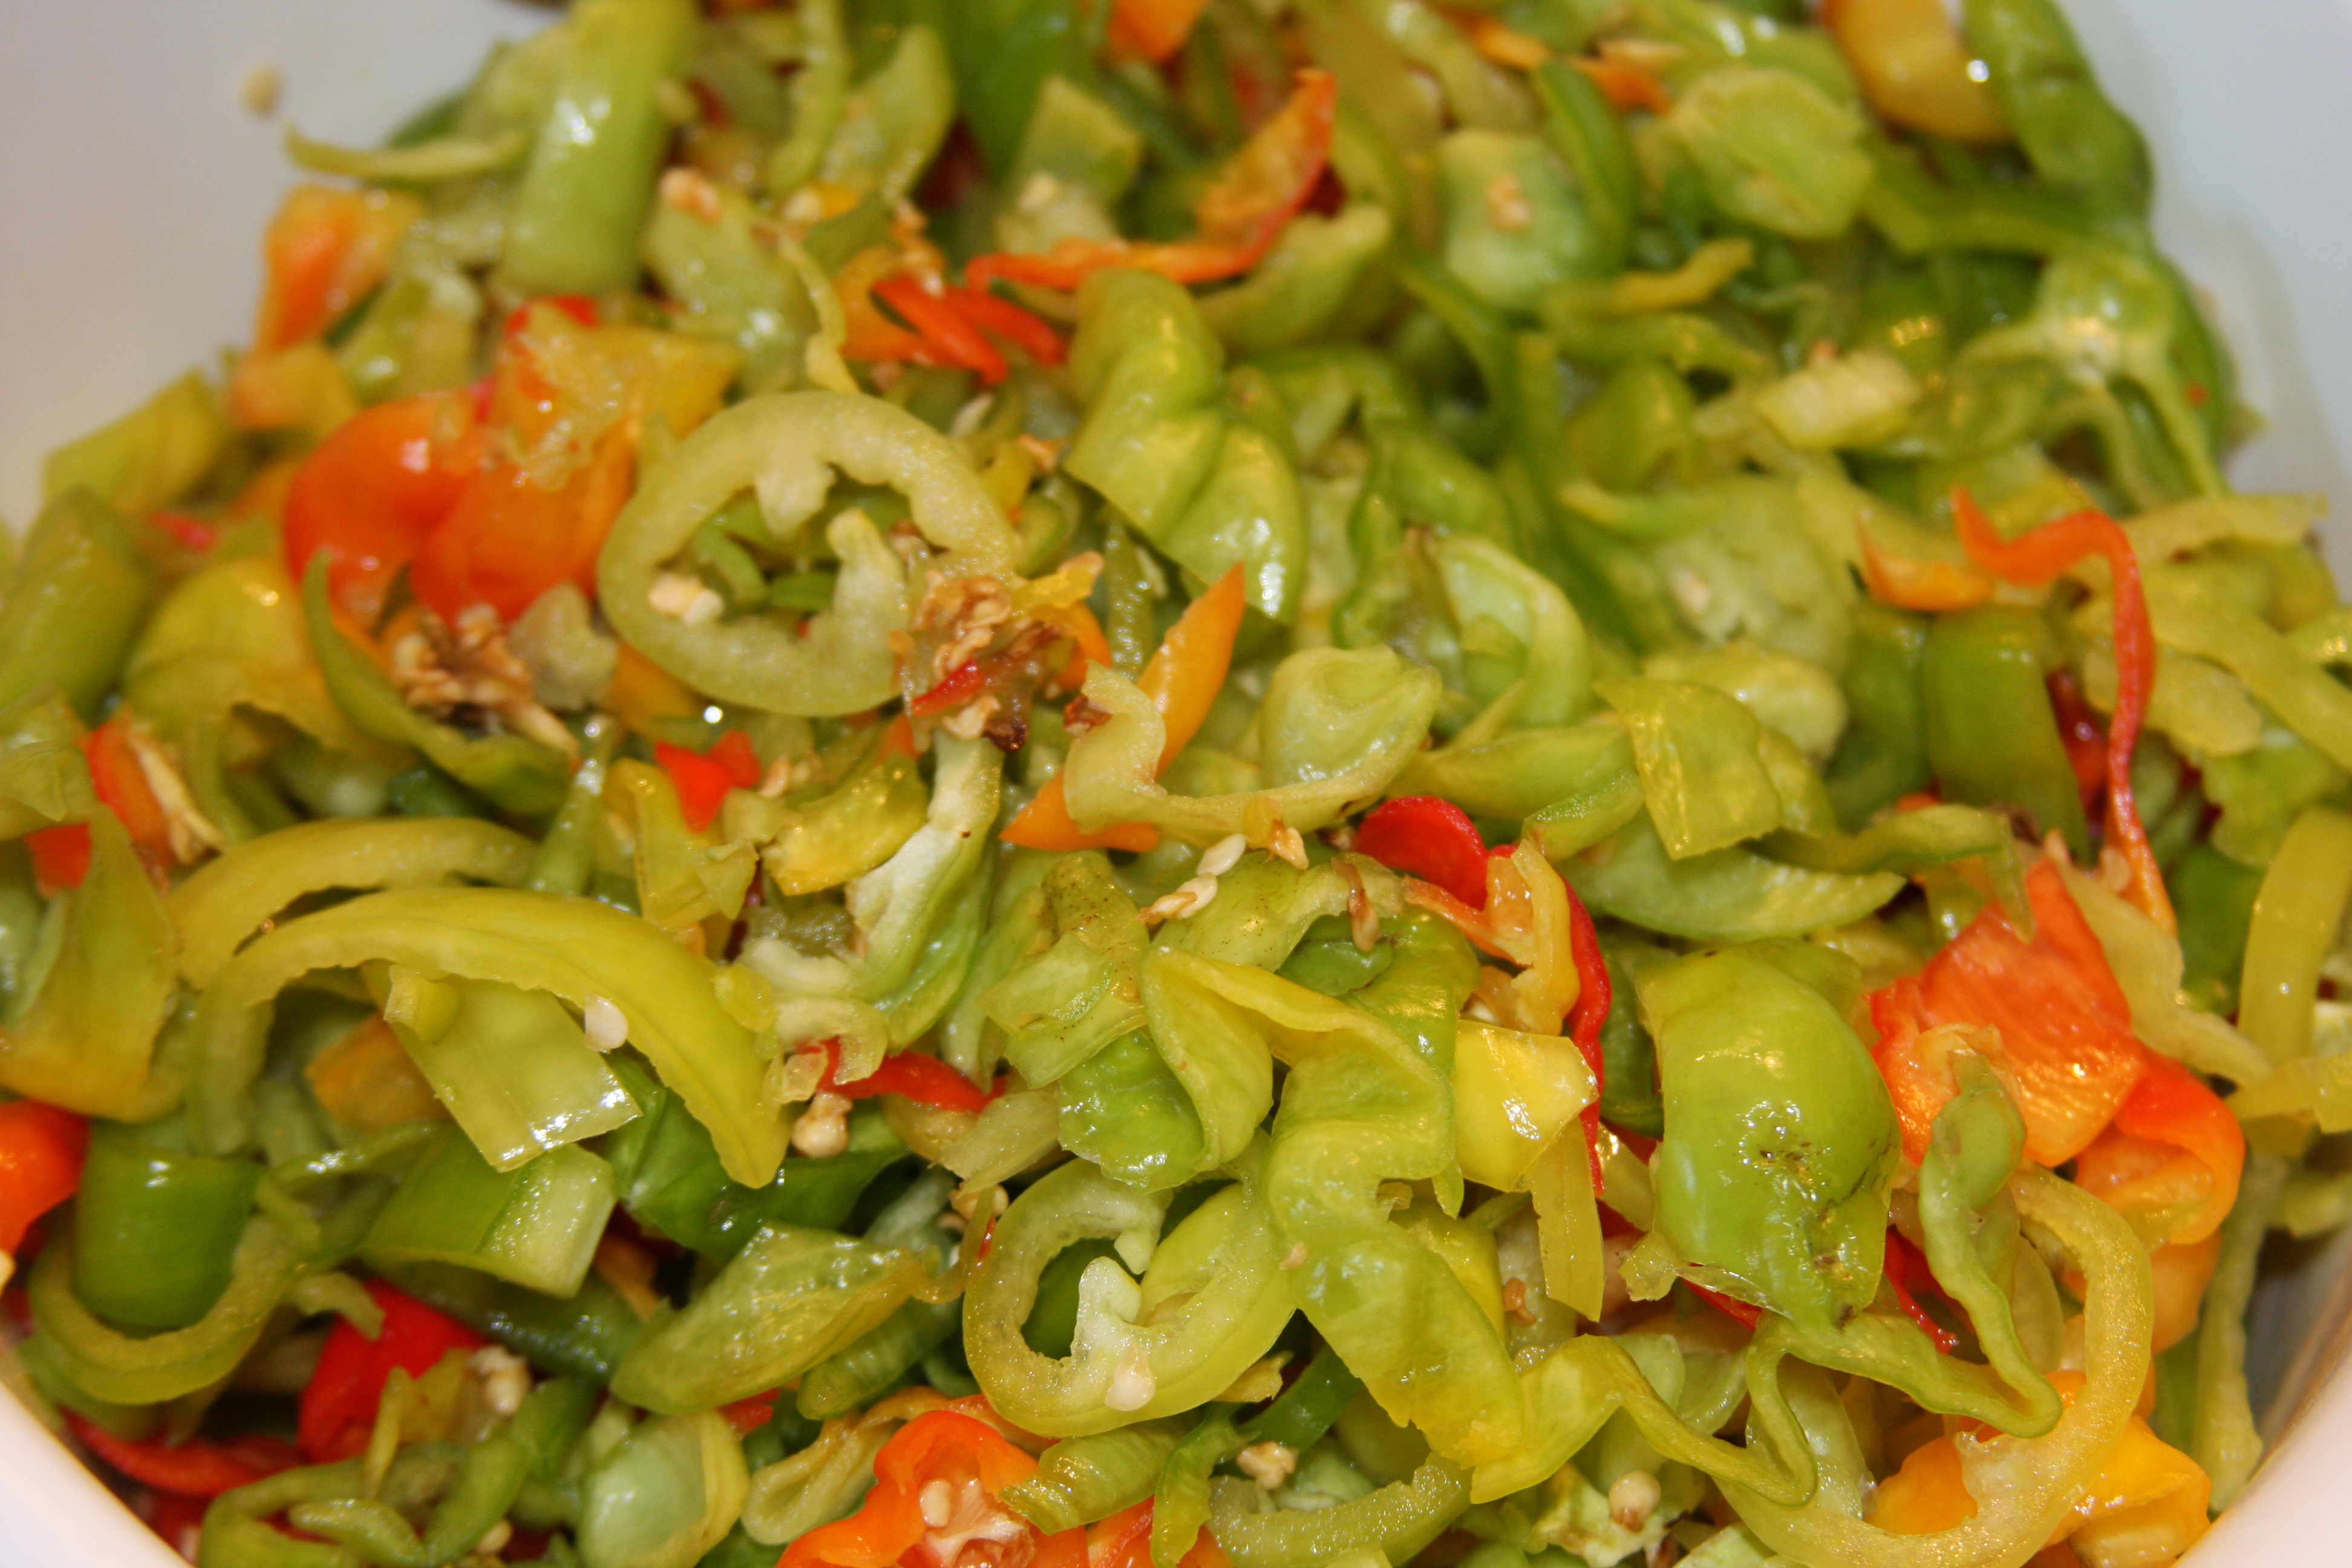
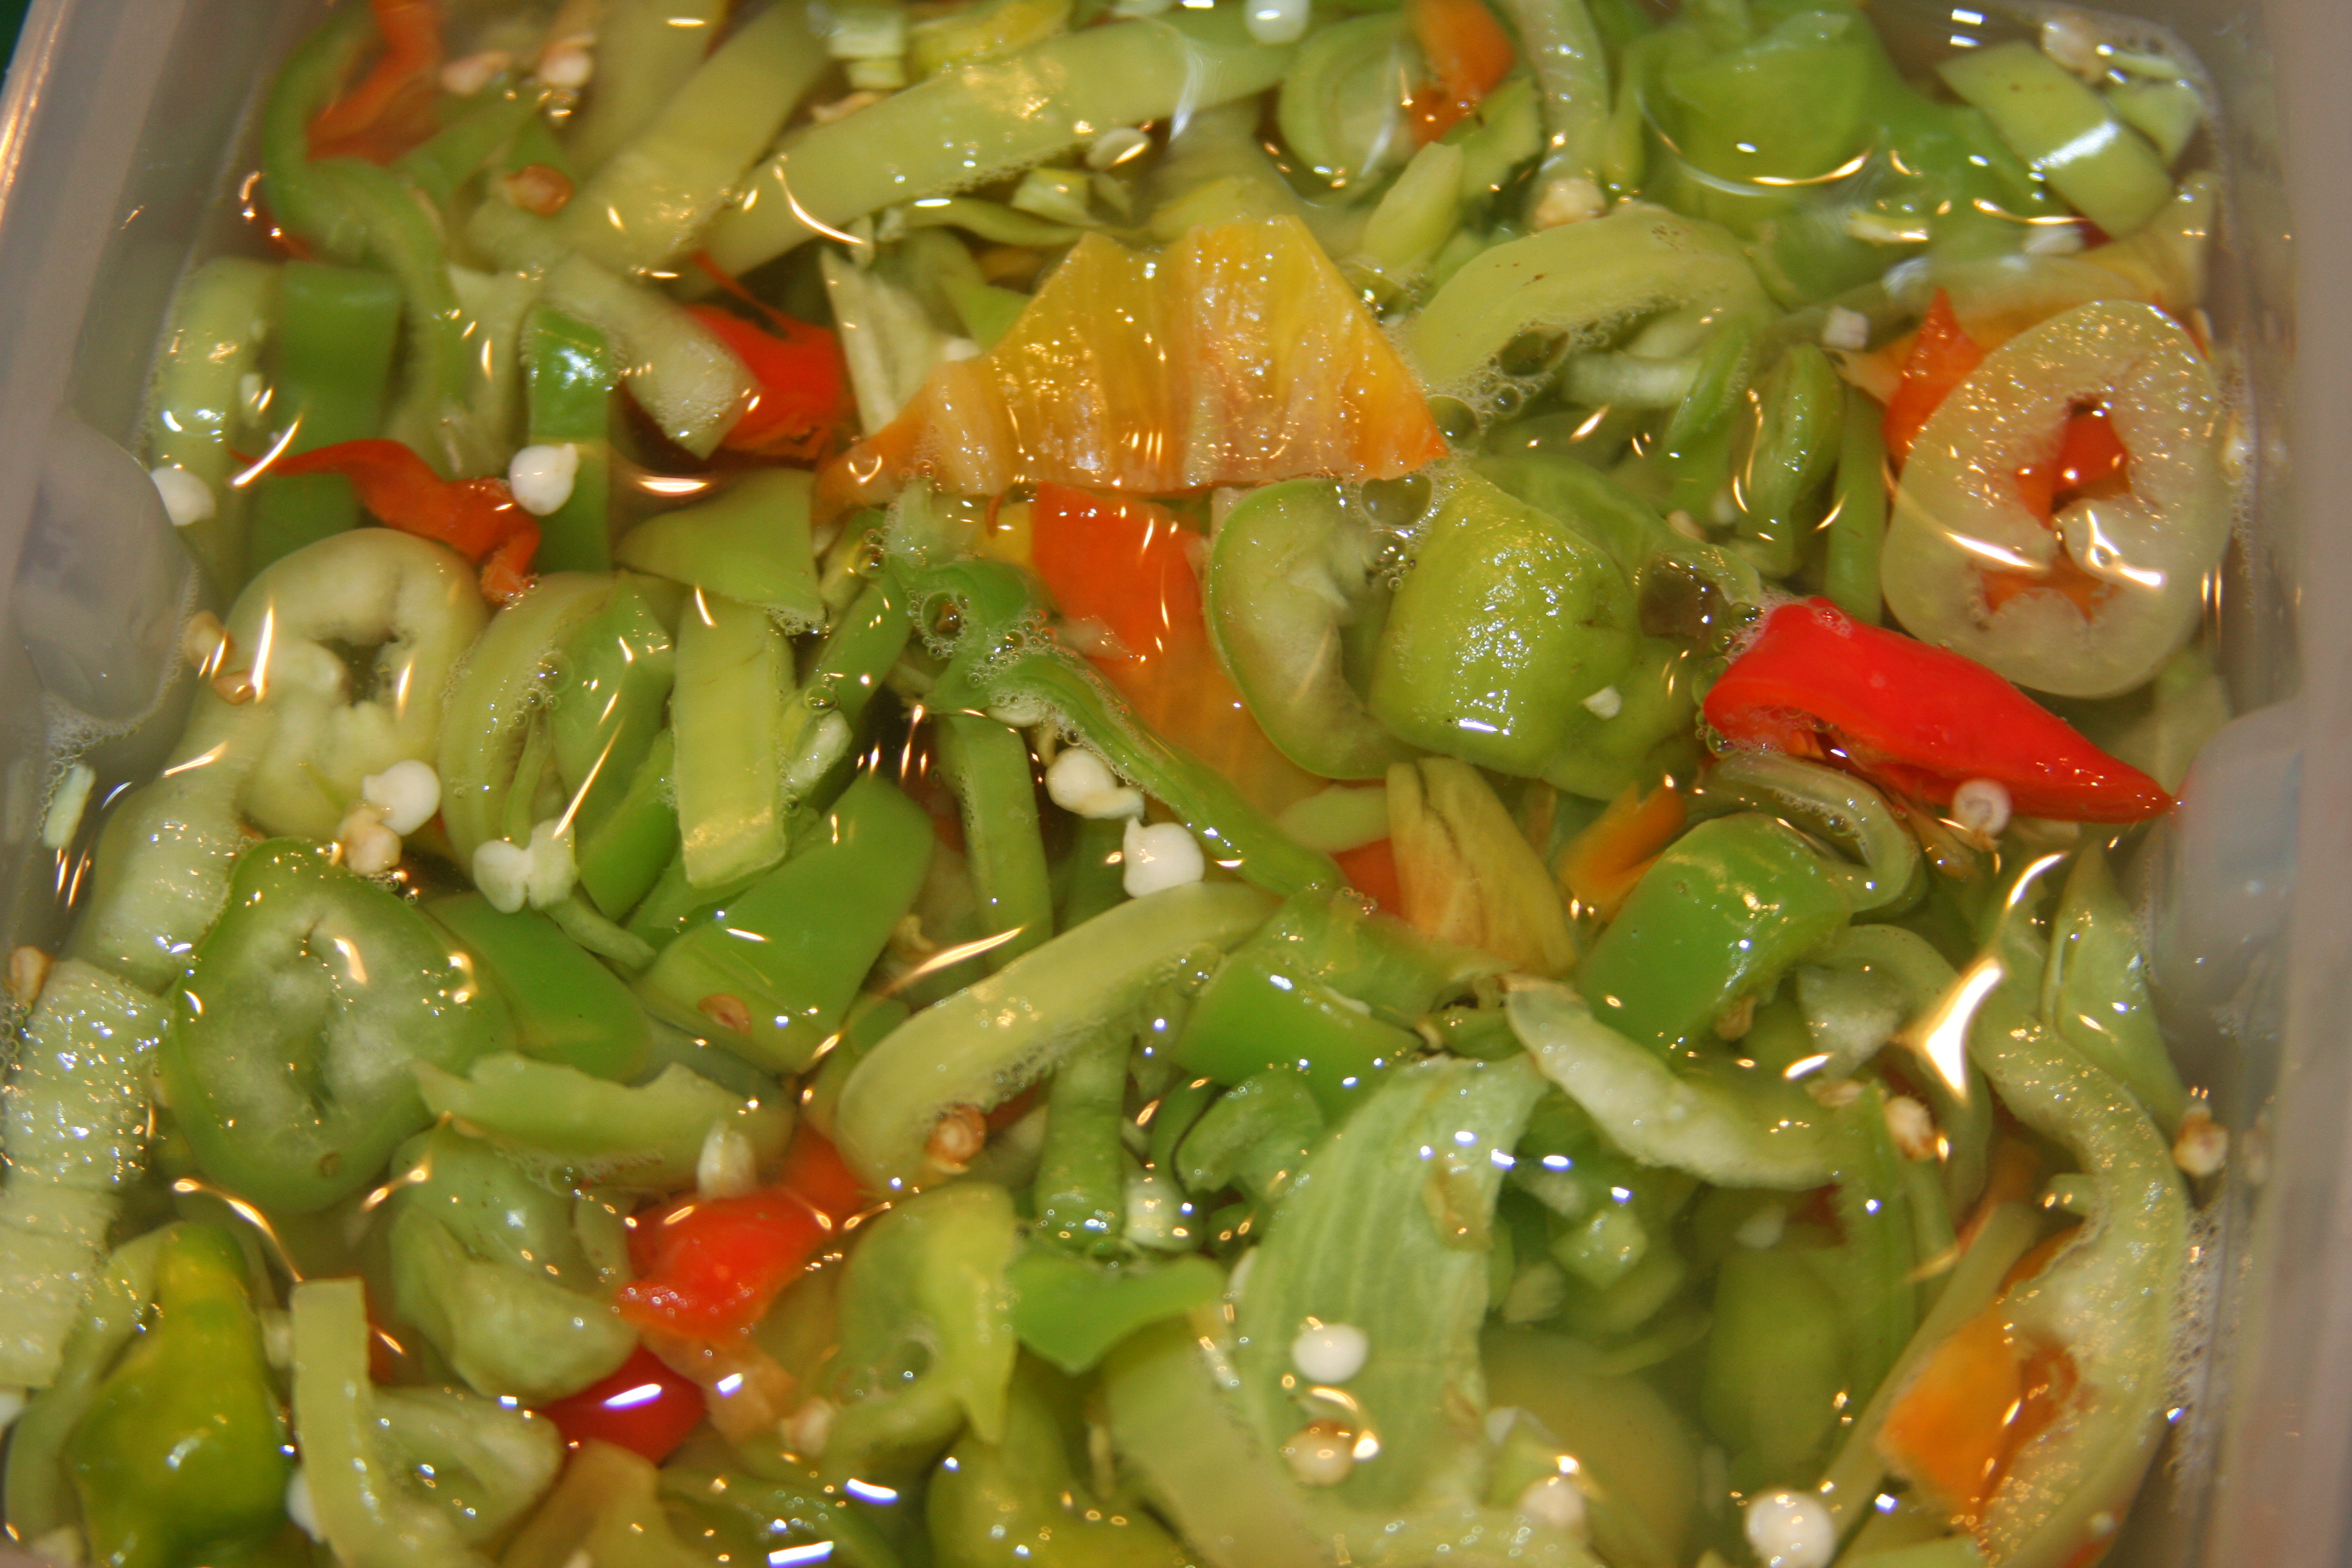
Since we like things a little on the hot side around here, we stuff ours with cheese, these Pickled Habaneros that I posted a couple of days ago and these Zingy Pickles. If you are going to do the habaneros, it is imperative that you use the zingy pickles as well. The sweetness of the pickles blends amazing with the heat of the habaneros, to tone it down just a touch.

If you have the time to plan ahead, throw your ground beef into a bowl and mix in a generous amount of sea or Himalayan salt, pepper and some very finely minced garlic. Cover with plastic wrap and let it sit overnight in the fridge. This makes for the most flavorful burgers, whether you stuff them or not.

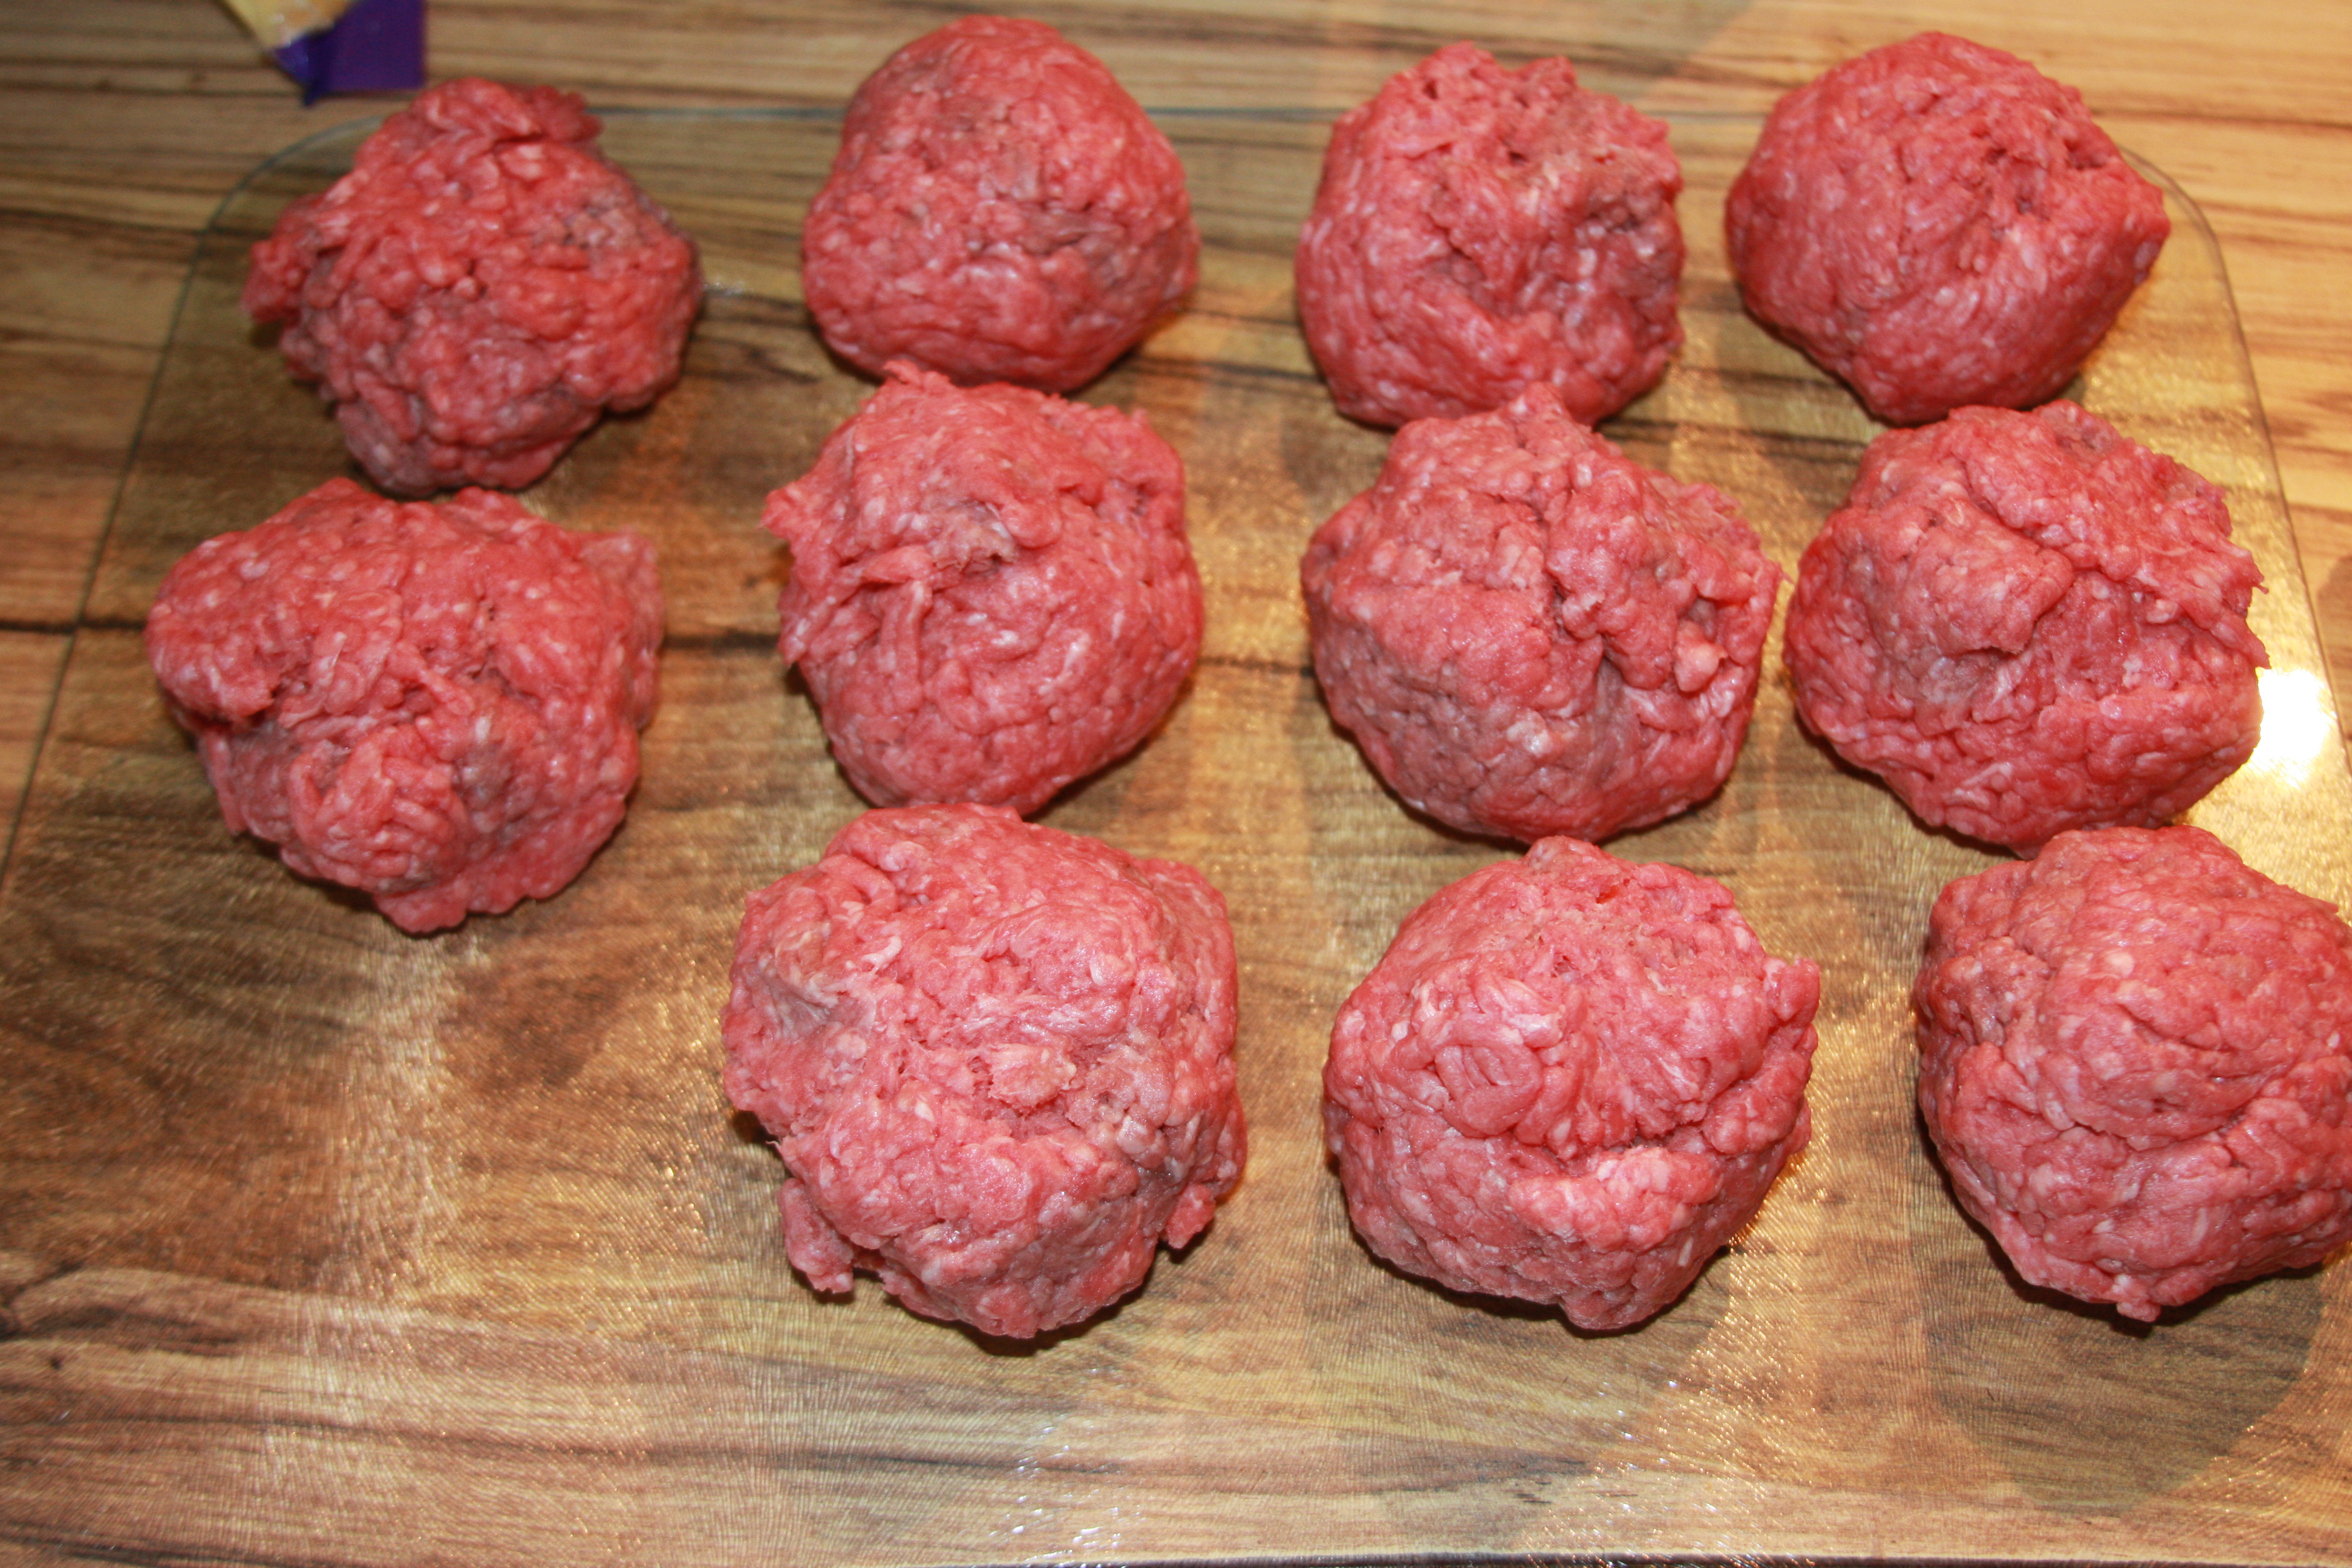
I have a kitchen scale and I use it to measure out the ground beef into roughly 1/4 pound sections. This makes for a nice size burger and enough meat to make a patty big enough for all the stuffing. If you don’t have a scale, just try to eyeball it so that you get each section about the same size. When I make these, I usually buy a large amount of beef and make quite a few at once and then freeze what I don’t need for that one night’s dinner.

IMG_5595
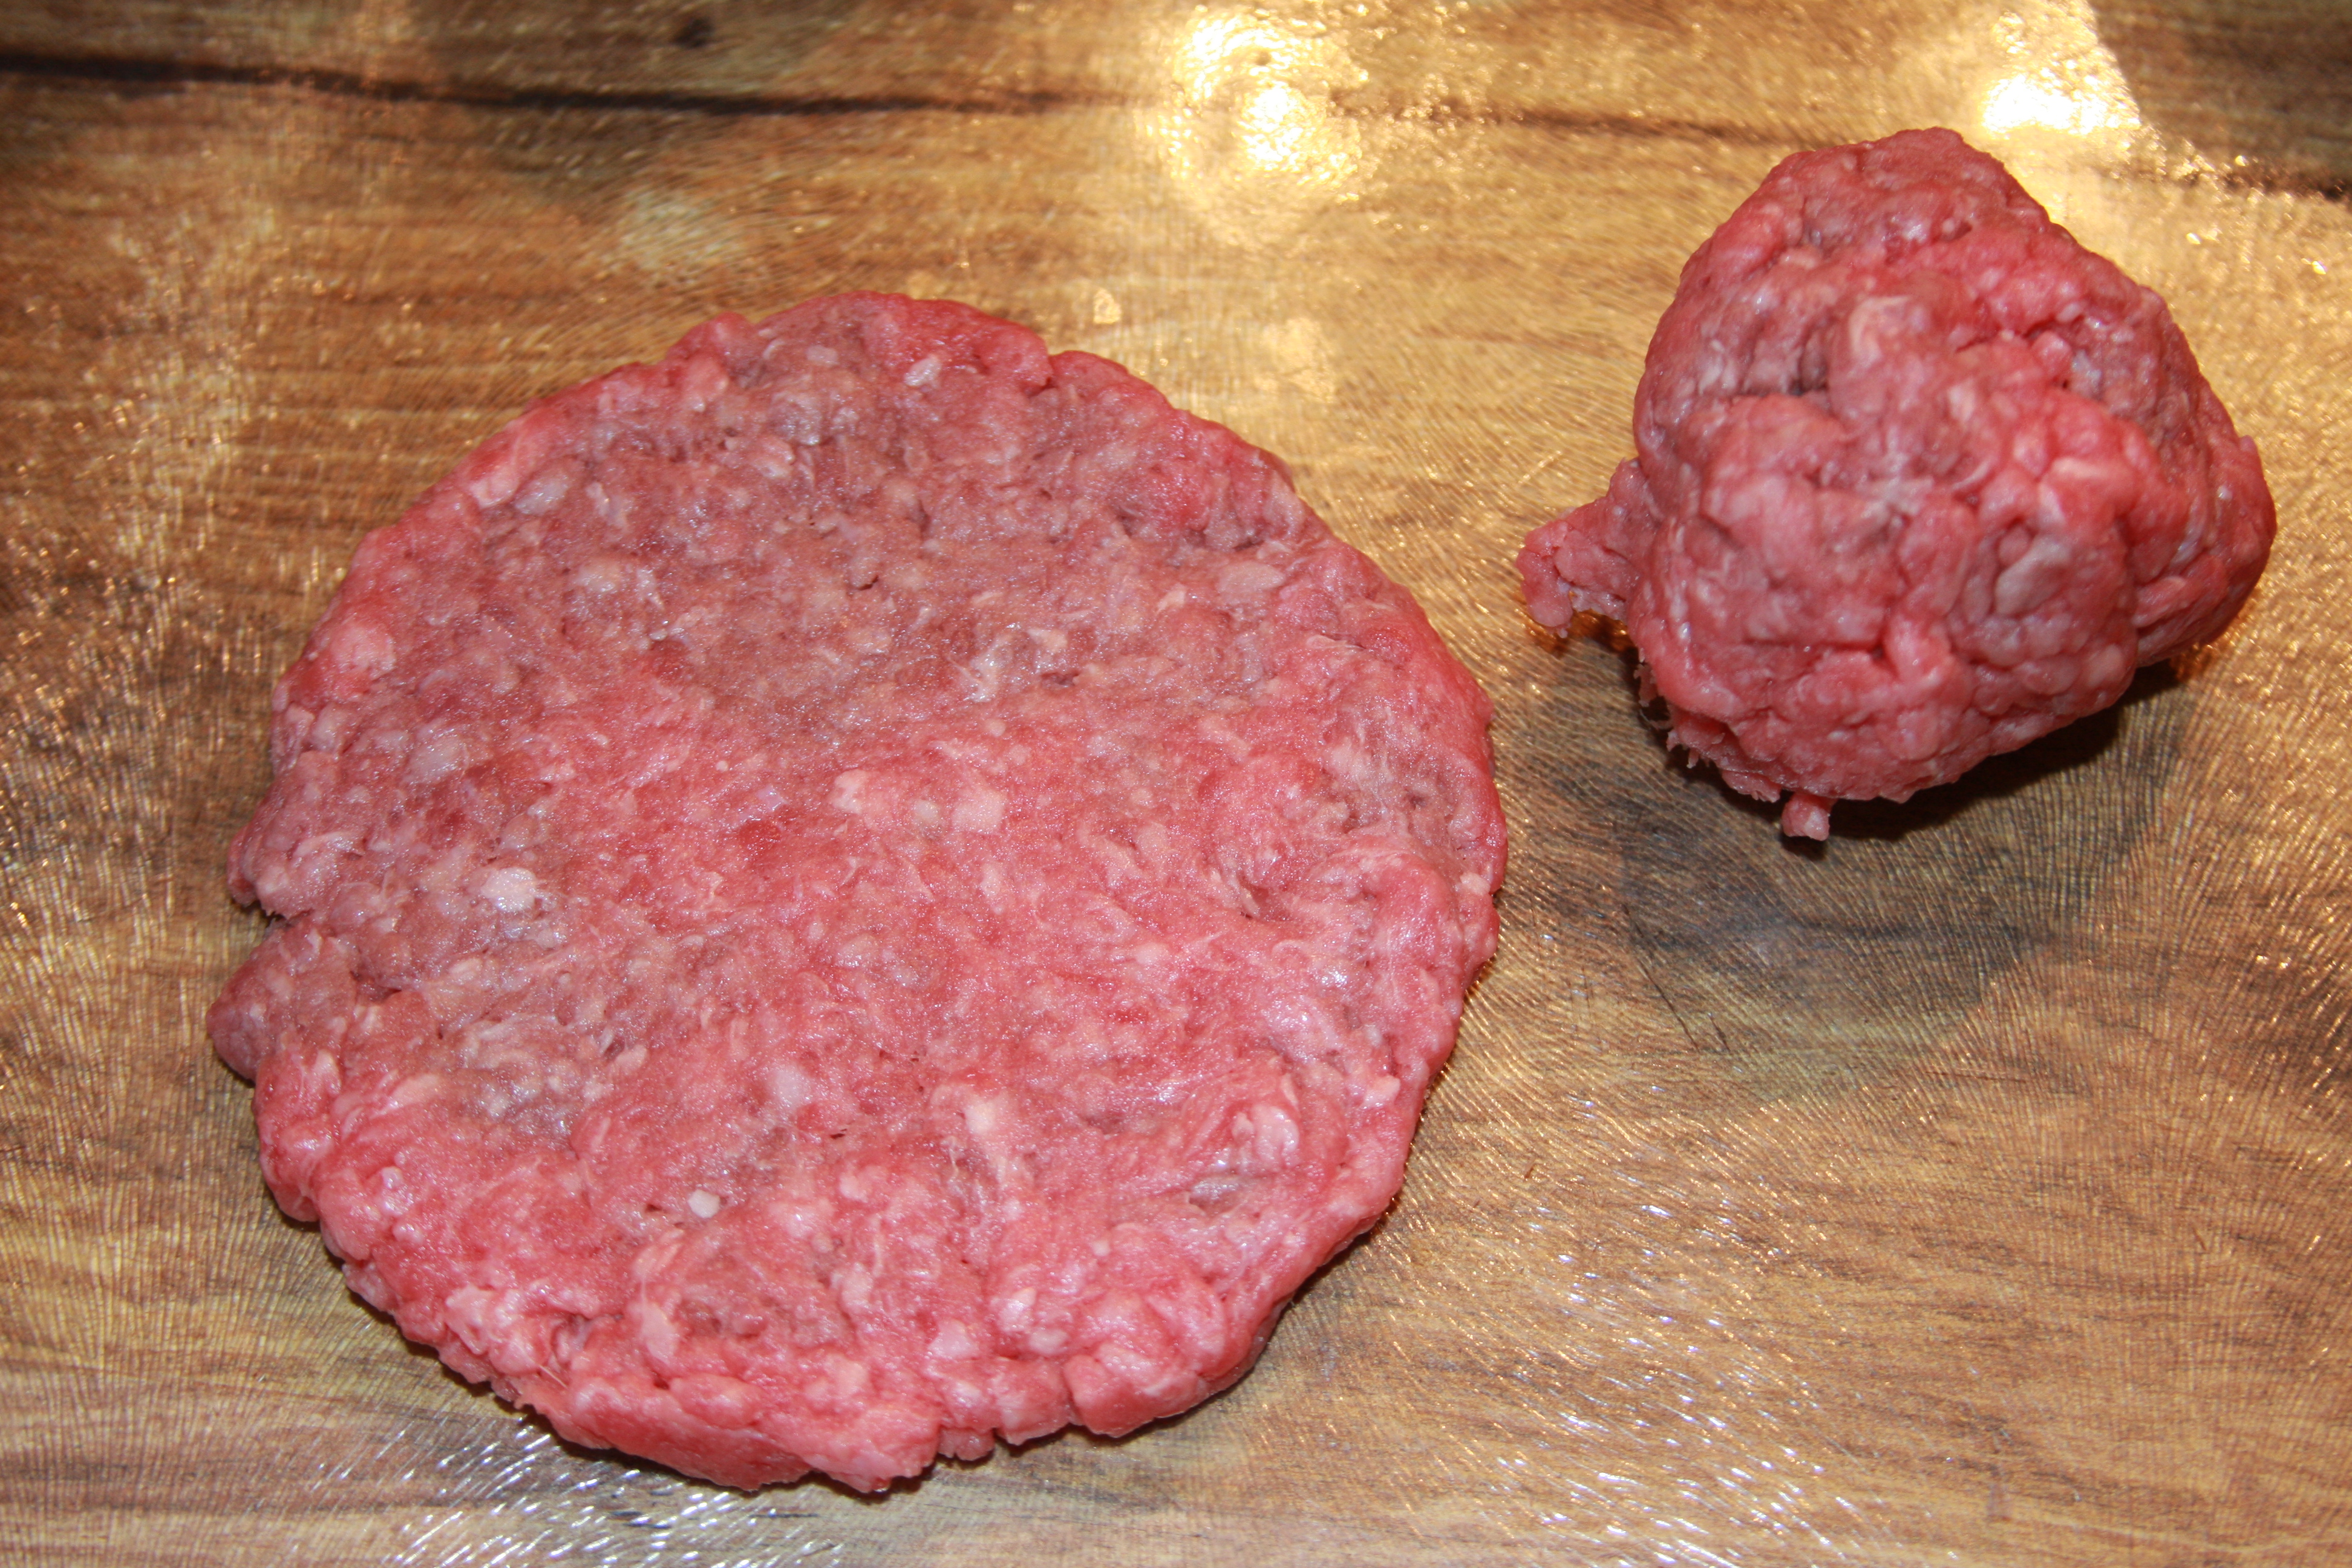
Take one section and squeeze it in half. Flatten one half with your hand. You don’t want this so thin that it will rip, but you want it to be a good size too. Just flatten with one hand while you push up on the sides with the other hand to create a small lip around the sides of the beef.

IMG_5596
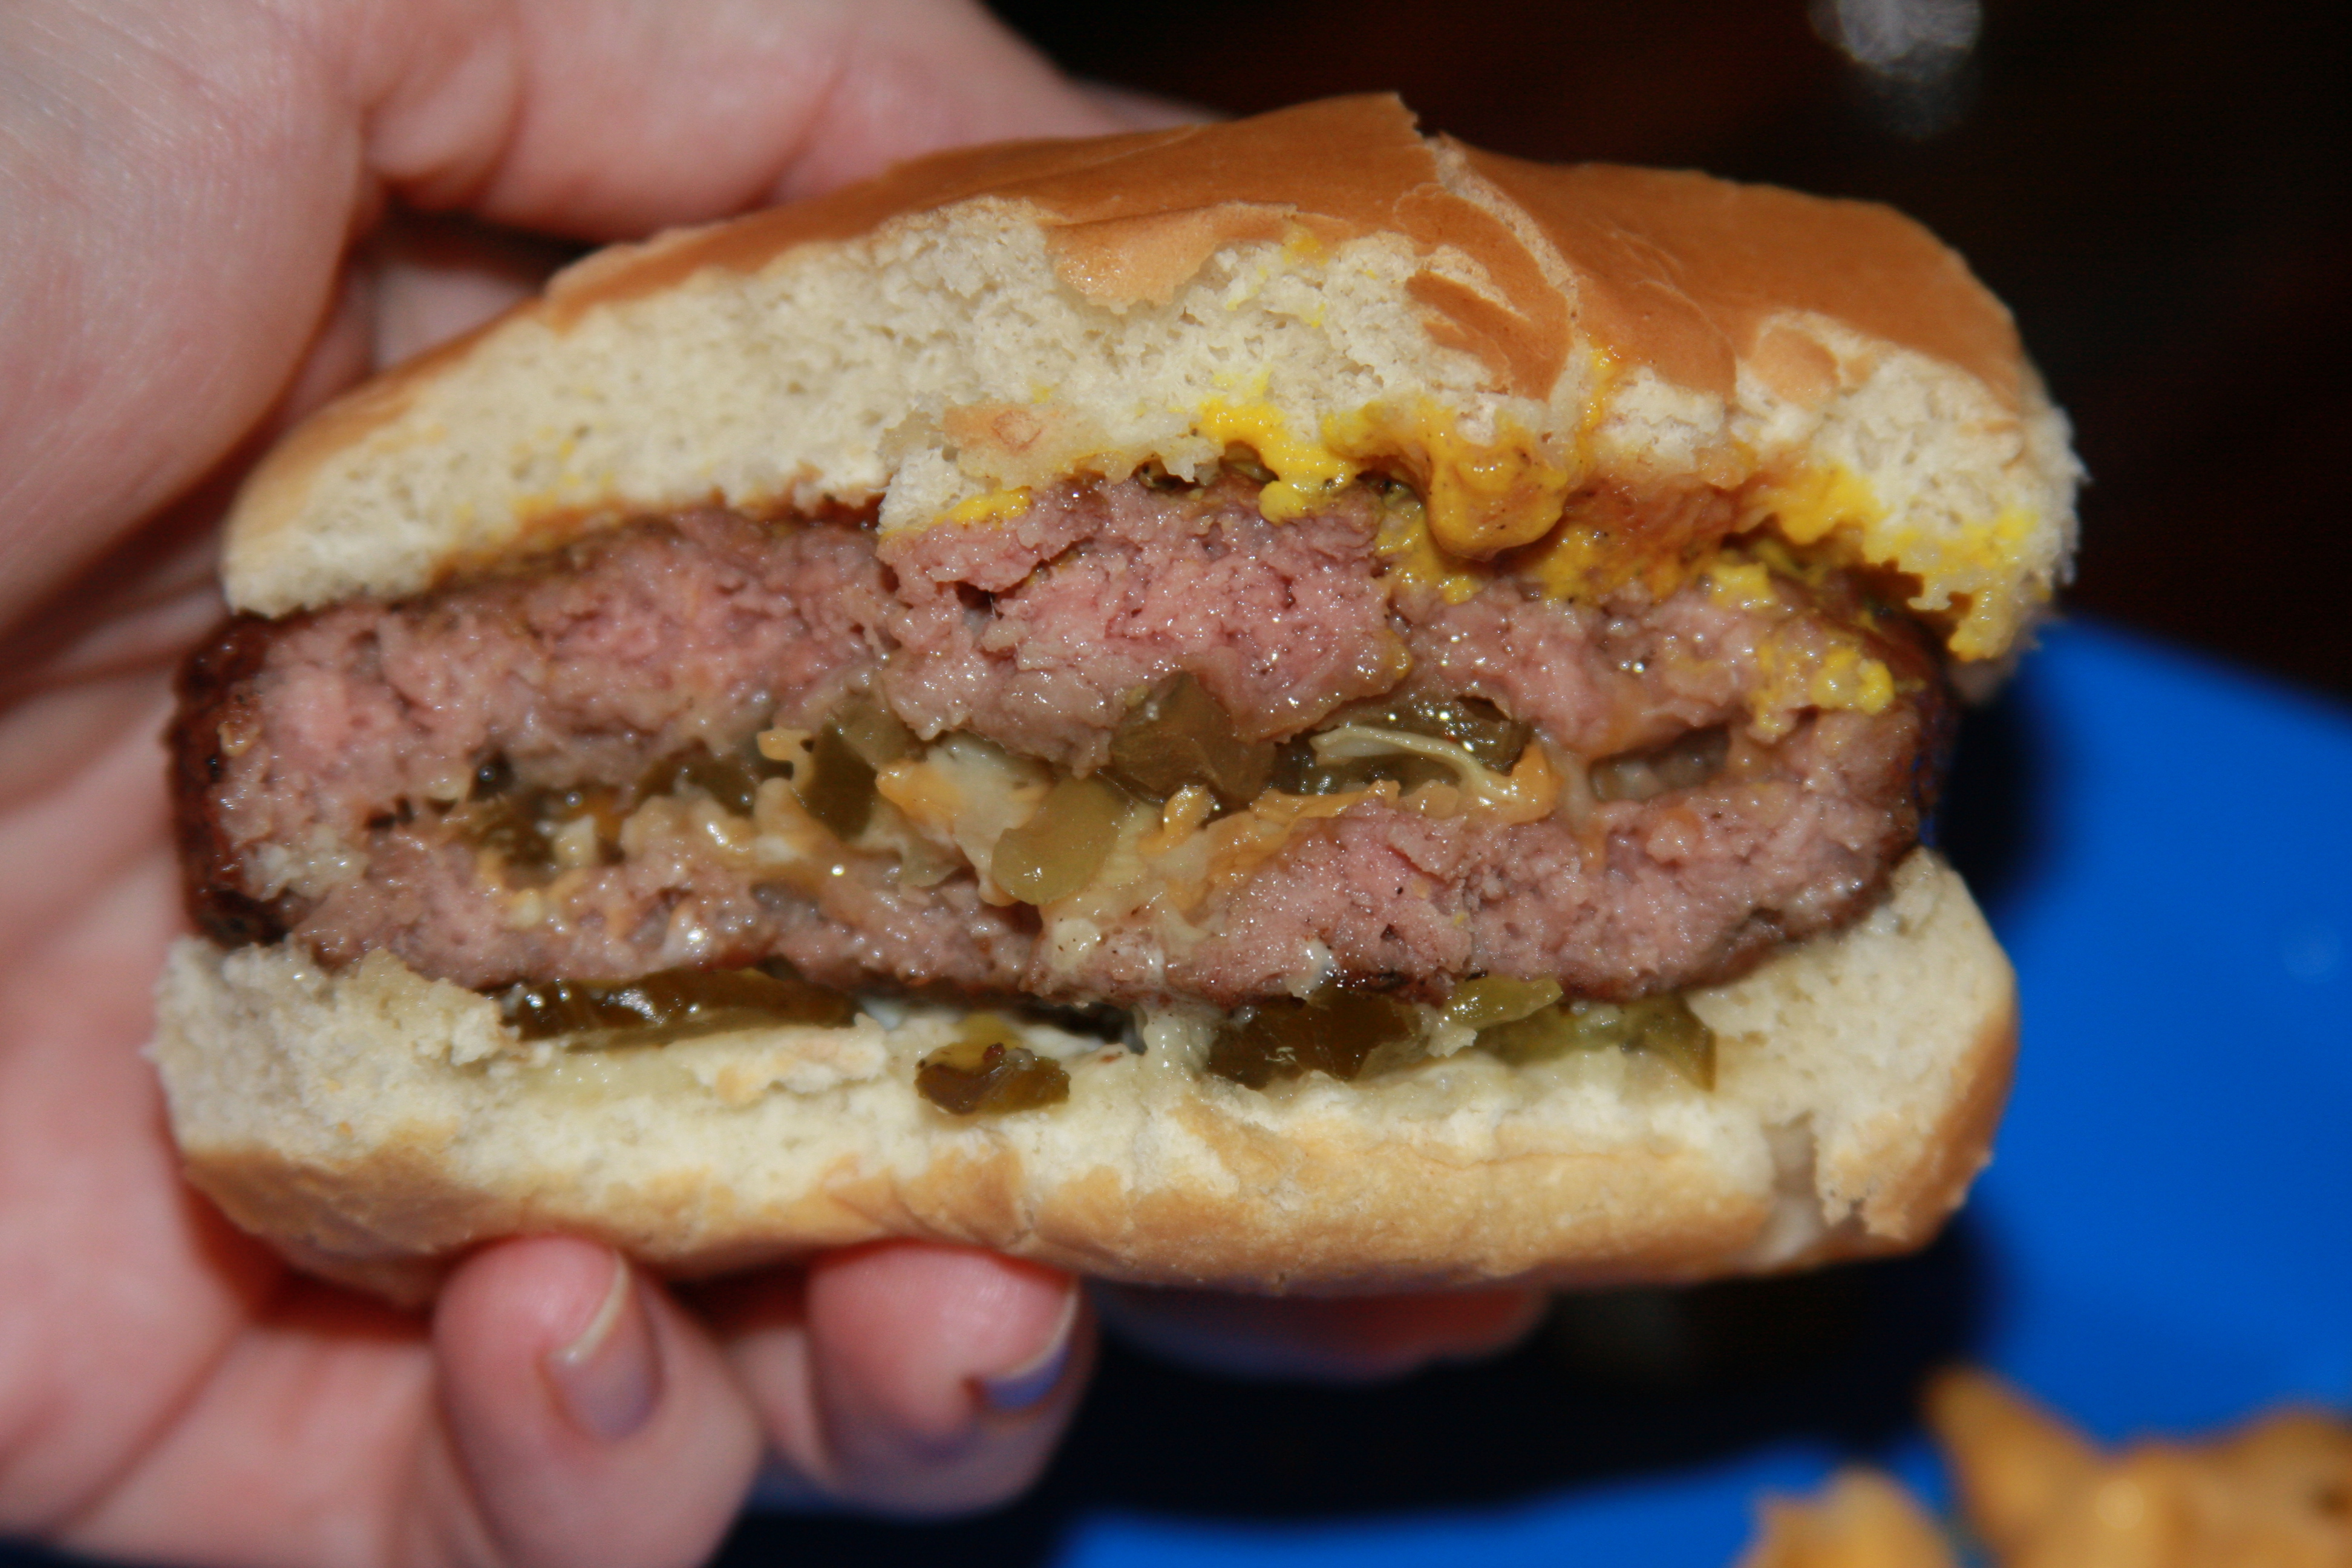
Then you are just going to top with your favorite cheese and whatever toppings you love the most on your burger. The possibilities are endless. This one has cheddar/jack, pickled habaneros and zingy pickles.

IMG_5605
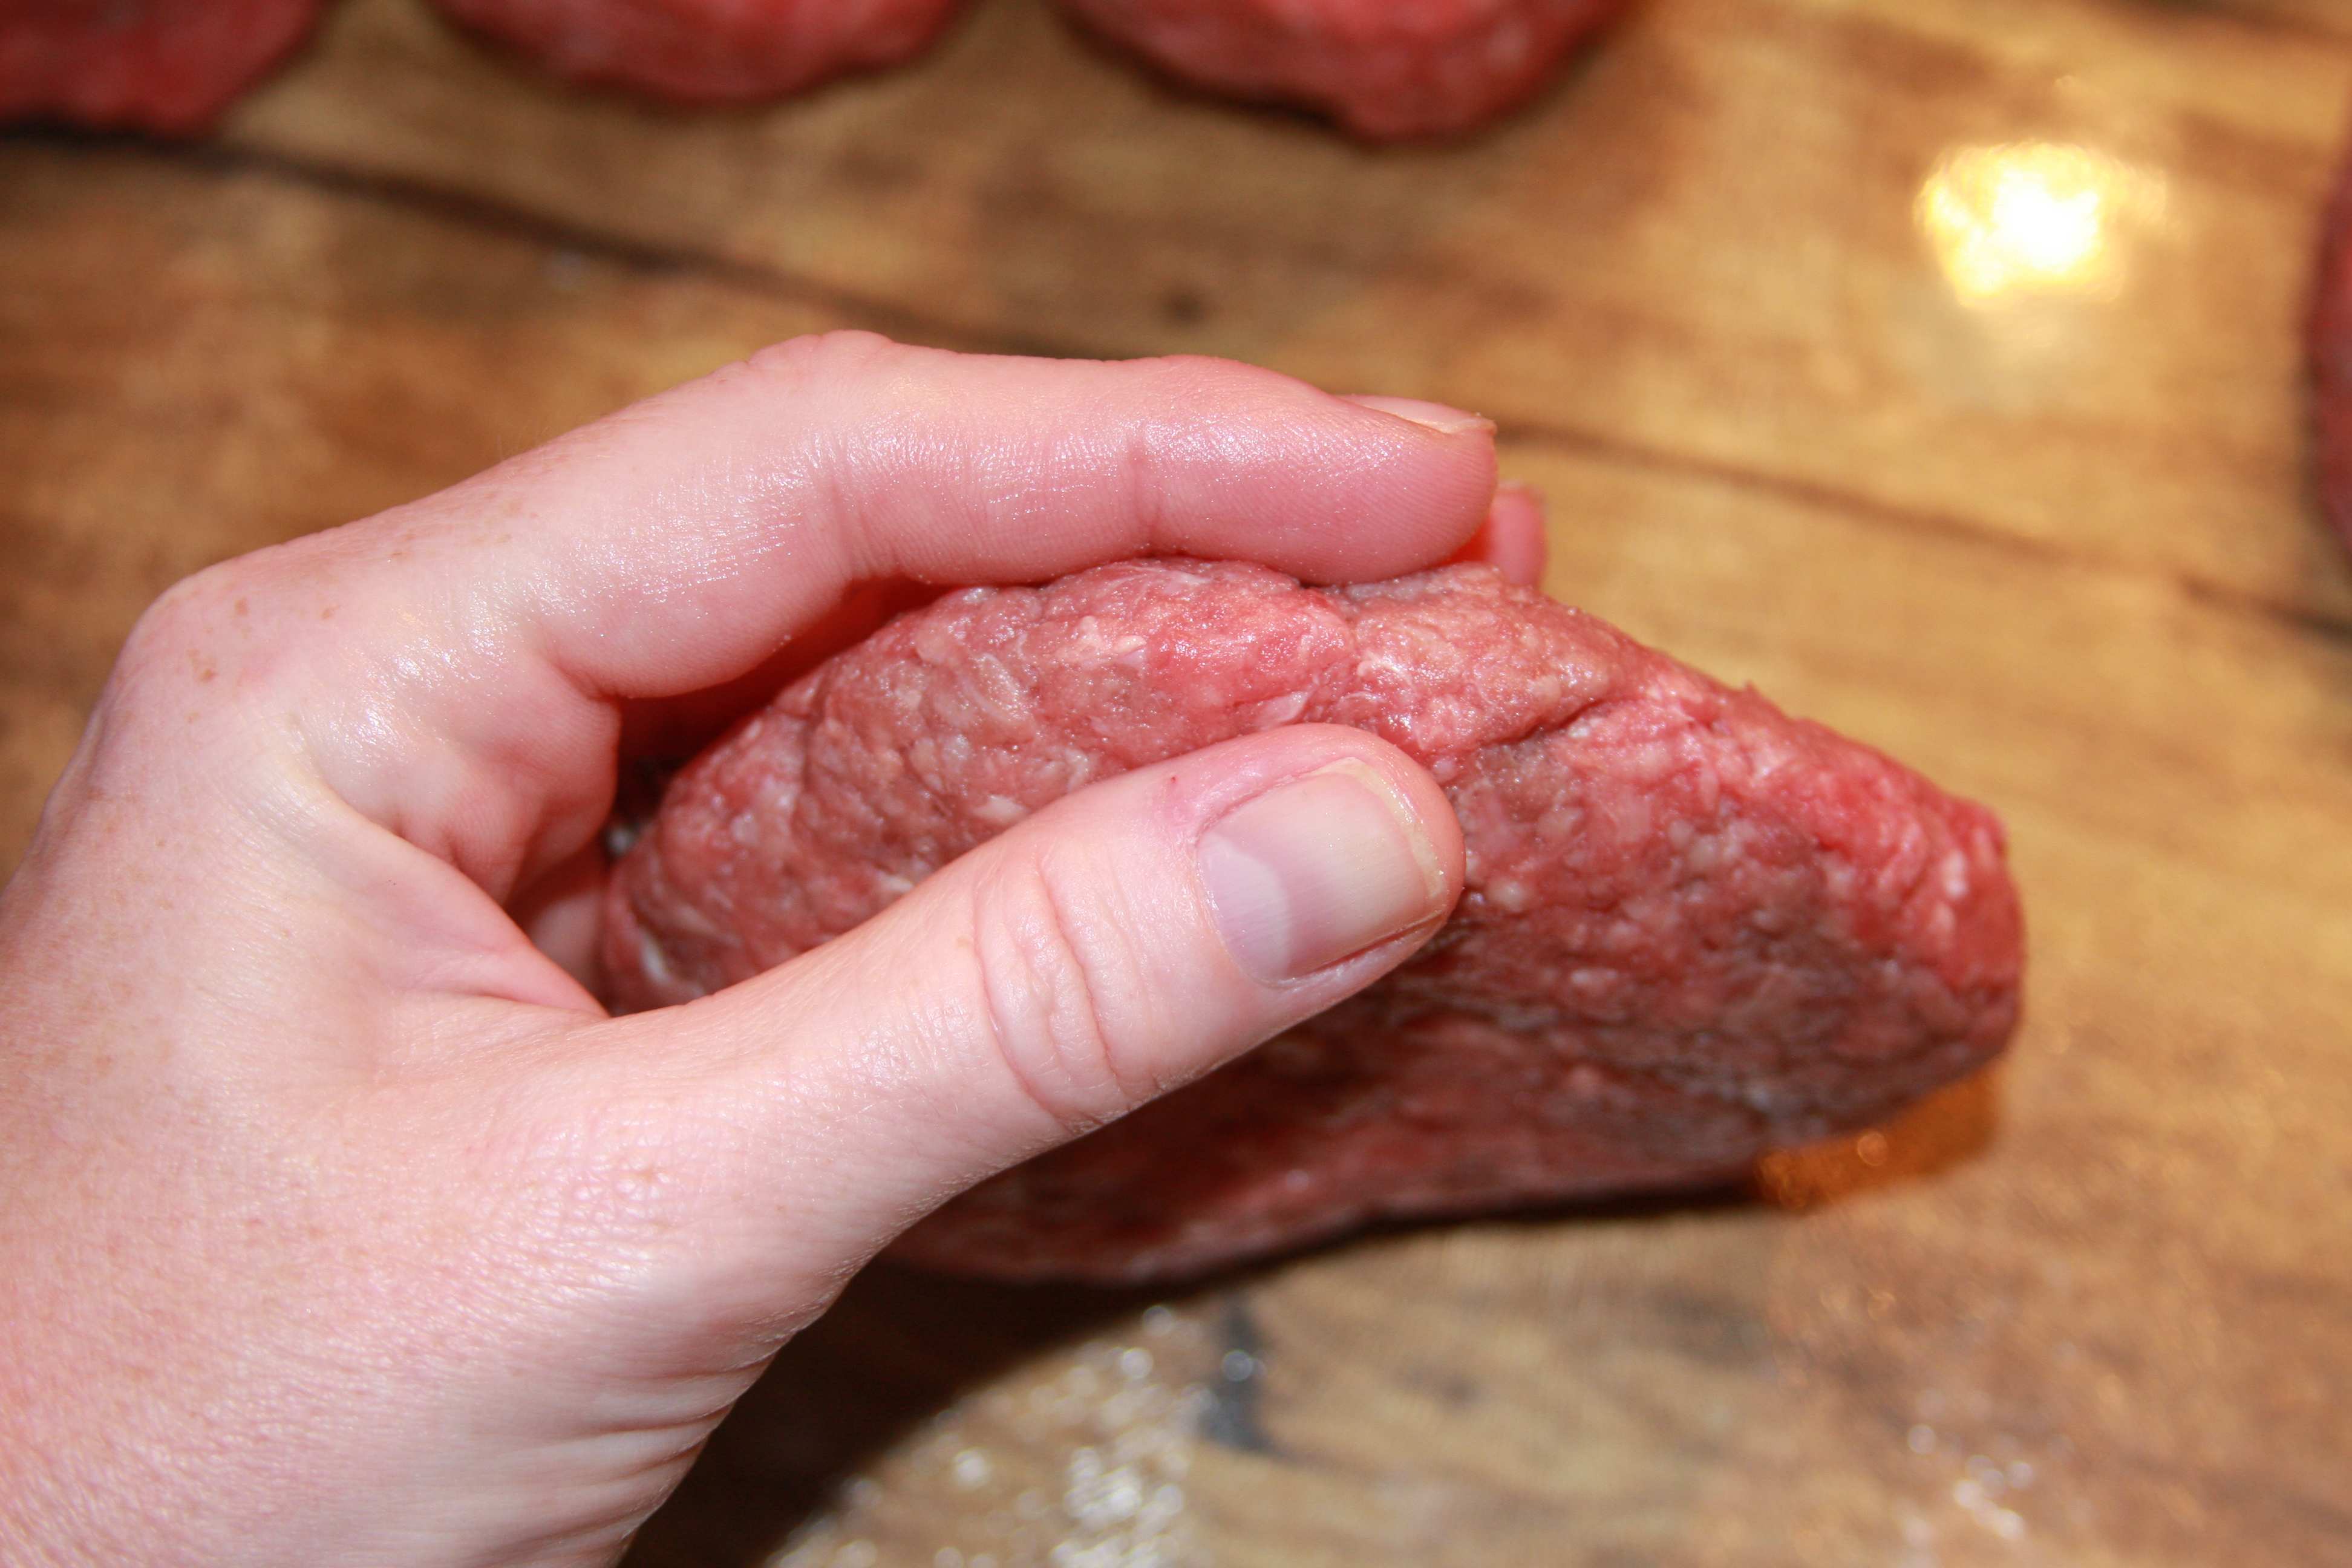
Then you just flatten out the other section of beef so that it is as big around as the first one. Lay it over the top of that one and press down the edges so that they are sealed. Then I usually pick it up in one hand and just pinch the edges together to make sure that they are completely sealed up. You don’t want to lose any of the good stuff when you throw these on the grill. Also, if you make a small indention in the middle of the top of a burger before you grill it, you won’t end up with a bubble burger, it will stay in the same shape and not swell up.

IMG_5602Once they are all stuffed and sealed up, then just cook them on the grill. Because the middle of the burger is stuffed, these do not take as long to cook as a regular burger. The stuffing keeps them super moist all the way through.

Every bite is amazing and full of flavor. The next time I am adding bacon to the middle and a sunny side up egg on the top! Mmmmmmm…..It’s making me hungry just thinking about it.

IMG_5612I encourage you to take the extra time the next time you make burgers to try them like this. I promise your gonna love it and you may not want to go back to a boring old burger again!

Advertisement
Posted in Beef, Dinner, Gluten-Free, Lunch, Recipes, Toppings | 2 Comments

Pickled Habaneros

Welcome to OhMyGoodyGoodness! Thank you to all of you who have been with me from the beginning and to those of you that are new here in the last couple of weeks. I have just been overwhelmed with all of the new followers here and on Facebook over the last few weeks. Thank you all for joining me and I hope that you will find a few things you like here. If there are any recipes you would like to see or if you have any questions, please feel free to let me know!

Some like it HOT, HOT, HOT! If you do, then this recipe is for you. My husband, son and our BFF John need to have hot stuff on every meal they eat. When we built our first garden last year, I started out by making these Pickled Peppers, and they liked those so much they wanted me to start making something a little, well, A LOT, more on the hot side. So, I started making basically the same recipe but using a blend of Habanero and Hungarian wax peppers. These have such an amazing flavor and you can use them to top pretty much everything.

I make these in a big batch because we go through them so quickly and I always give a big jar to John to take home as well. You can easily cut this recipe in half to make a smaller portion if you won’t go through them as quickly as we do.

You could use a combination of other peppers in this recipe, I just found that these two blend really great together.

I am sharing this recipe today, because I am making my famous stuffed habanero burgers tonight for dinner. These burgers are seriously the BEST burgers and we are completely addicted to them around here. These burgers include the crucial topping of these Zingy Pickles. So, if you love burgers and your looking for a recipe for a really great one, make these peppers and these pickles and keep watching the blog for the recipe for the burgers coming in a few days!

Please make sure that you are wearing a pair of latex gloves for this. DO NOT try this without wearing some kind of gloves. These are extremely HOT peppers and will cause severe damage and burning to skin and eyes. Be very, very careful when making this recipe. When I make these, even the fumes are overwhelming and I usually have to open up my kitchen window.

*This recipe is gluten free

**This recipe is vegetarian

Pickled Habaneros

  • 1 pound of habanero peppers
  • 1 pound of Hungarian wax peppers
  • 2 cups of water
  • 2 cups of white vinegar
  • 4 teaspoons of white sugar
  • 4 teaspoons of salt (I use either sea salt or pink Himalayan salt)
  • 4 teaspoons of minced garlic

These are what habanero peppers look like.

IMG_4349These are what Hungarian wax peppers look like.

IMG_4350You are going to cut off the tops of the peppers and dispose of them. I do not get rid of the seeds, I keep them and add them to the mix. Then, you can either cut the peppers in small rings, or you can chop them up into very small pieces. When I started making these I left them in rings, but then my husband would always end up cutting them in smaller pieces to put on whatever he was eating. So now, to save this step, I just started cutting them smaller at the time I make them. This picture shows them left in a larger size.

IMG_4351I chop them all up and mix them together by hand so that both peppers are well combined.

It is best to put these in a glass jar (Mason jars work great), unless you have a plastic container that you never plan to use to store anything else in. Once the peppers are mixed up, place them in container of your choice.

Add vinegar, water, salt, sugar and garlic to a saucepan over medium heat and bring it to a rolling boil, then remove pan from stove. You will pour this liquid mixture of the peppers and leave set, with no lid, on the counter until it cools down.

IMG_4904IMG_4353Add a lid and store in the refrigerator. These peppers will last several months when stored cold.


Posted in Appetizers, Breakfast, Dinner, Gluten-Free, Lunch, Mexican Inspired, Recipes, Salad, Sides, Snacks, Toppings, Vegetables, Vegetarian | 21 Comments

My New Favorite Snack

I live in a house where every one of us is a snacker, and mostly for some kind of crunchy snack. Over the last couple of years, as I have tried to eliminate all of the junky foods out of this house, I have been on the ever evolving quest to find healthy things to snack on that everyone will eat. We love all kinds of chips and tortillas and salsa. Now I mostly shop at Vitacost.com, for snacks, because the prices there are so much cheaper than your local health food store and they offer free shipping on every order over $49. I have noted that I save between $1-4 (sometimes more depending on what I am buying) per item over buying it at Whole Foods or Chamberlains. Vitacost makes it so much more affordable to be able to purchase healthy foods for my family. They offer tons of food items that are gluten free and non-GMO and a wide variety of healthy chips!

One item that I purchase often are these rice cakes. I used to only be able to find them at WF, but, on my last order to Vitacost, I realized that they carry them there now.  I prefer these because they are very thin and when you top them with something, you don’t feel like all your eating is a rice cake.IMG_5376I usually eat these topped with Cashew Butter, but on my last visit to Vitacost, I found this walnut butter. I absolutely fell in love with the taste of it and it has become my new favorite.

IMG_5374I also use a lot of coconut oil. If you haven’t researched the benefits of coconut oil for your health, you should! I used to pay quite a bit for the small 14 oz jars at my local grocery store, so this last time I decided to check out what Vitacost had. I found this 54 oz container for $21.49. It is organic and extra virgin, and the flavor of it is so fresh and delicious. I love it, especially the price!

IMG_5373Ok, so I share all of that with you to get to my favorite evening snacks. I love to take some of the walnut butter (you could use almond or cashew butter too) and mix it with a little bit of the coconut oil and then spread it on the rice cakes. The flavor is so good and it really satisfies my need for snacking in the evenings, and I don’t feel guilty about what I am eating.

Last night I decided that I needed something just a little bit more than that. So, I grabbed a few things and threw this together. You could add in so many other ingredients to this and change it up so that you would always have some variety. I am not usually very big on sweet stuff, but last night I had a chocolate craving and I love the flavor of chocolate and pineapple together. This made one serving.

*This recipe is gluten free, just make sure your chocolate is.

**This recipe is vegetarian.

  • 2 Suzie’s rice cakes, chopped
  • 1/4 cup fresh pineapple, chopped
  • about 2 tablespoons shredded coconut
  • 1/2 cup walnuts, chopped
  • about a 1/4 cup dark chocolate (I used the chips I had, but you could use a bar of chocolate and chop it up)
  • coconut oil

Add all the ingredients to a small bowl and drizzle about 1 – 1.5 tablespoons of coconut oil over the top and mix well.

IMG_5366


Posted in Candy, Dessert, Gluten-Free, Products, Recipes, Sides, Snacks, Toppings, Vegetarian | Leave a comment

Greek Style Chicken with Peppers and Olives over Spinach

IMG_4742I threw this dish together for the first time about 3 months ago. I was in the mood for something Greek because I had just bought a block of this amazing organic Feta cheese. I was looking for something a little different and with a little more flavor than another dish I had been making for years. So, I rummaged through the fridge and the pantry, and just started pulling out everything that I thought would fit together. The final outcome was even better than I imagined it would be. It became an instant family favorite and has been in the regular rotation around here ever since.

This dish is bursting with flavor and had the most fresh and delicious taste served over spinach.  When topped off with the salty and tangy flavor of the Feta, well, let’s just say that you really need to make this!

As I have said in the past, I live with some pretty picky people, who are all picky in different ways, so I am always having to figure out ways to accommodate everyone while still making amazing dinners. I finally got my husband to eat onions and peppers all the time by cutting them into very small pieces and making sure they are fully cooked and not crunchy. With this dish, you could totally skip the step where you cook those on the stove first to make sure they will be nice and softened when the dish is ready. Just cut them up, in bigger chunks and throw them right into the baking dish and let them cook for the same amount of time the chicken does. I would prefer to have mine cut into more of a wedge and not precooked, but, hey, as long as I at least get to eat them, I will make it work. So, feel free to slice them, dice them, chop them or leave them in large wedges. My husband will also not touch mushrooms, so I just add them around the edges so he doesn’t have to pick them out!

They also will not eat big chunks of garlic, so I just mince it up and cook it with the veggies. Feel free to use cloves of garlic, whole or sliced. Tonight when I made this for dinner I threw in some of this Pickled Garlic I make. I just sliced it up and threw it on top. If you love garlic, I highly suggest making this pickled version. I am completely addicted to it. I make a batch on a regular basis.

*This recipe is Gluten Free if you use a GF Greek seasoning.

**For the vegetarian version, just eliminate the chicken and add more veggies

  • 1 – 2 pounds of boneless, skinless chicken breasts (depending on how many your serving)
  • 1 – 1.5 cups olives, you will want a variety (I used calamata, manzanilla and black olives)
  • 1 carton grape tomatoes
  • 1.5 – 2 cups red, yellow and orange sweet peppers
  • half of a sweet onion
  • half of a red onion
  • 1 large lemon
  • 3/4 cup white wine (If you don’t do wine, you could use chicken broth)
  • garlic cloves or minced garlic, to taste
  • 2 – 3 tablespoons of capers
  • mushrooms, whole or sliced (optional)
  • peperoncinis, whole or sliced (optional)
  • fresh spinach
  • feta cheese
  • salt and pepper, to taste
  • Greek seasoning, to taste (I use Konrico brand, it is gluten free and contains no MSG)
  • 2 tablespoons of olive oil (if your going to cook it like I have to)

Dice up all the peppers and onions.

IMG_5267Heat a large skillet over medium heat and add in some olive oil and a big heaping of minced garlic.

IMG_5269Stir the garlic around and let it cook for a minute. Just until the flavor pops, be careful not to burn it. Then throw in the peppers and onions, season them with salt, pepper and Greek seasoning, and let them cook for about 2 minutes.

IMG_5271Ohhhhhhhhh, look at all the goodness in that pan!

While the veggies are cooking I usually cut the grape tomatoes in half. Again, you can leave them whole if you want to. My mom cannot eat anything spicy, but the rest of us love it. So, you can add in the peperoncinis whole and leave them around the edge of the dish or put a couple in the middle, or, you can chop them up and throw them right in the mix with everything else.

I usually cut the chicken breasts in half down the middle and then cut the strips into bite sized chunks. You could leave and serve them whole if you prefer.

IMG_5276You are going to need a 9 x 13 baking dish for this. Basically you are just going to throw everything into the baking dish and stir it all up together. Season well with salt, pepper and Greek seasoning. I always go a little heavy on the Greek seasoning. Squeeze the juice from the whole lemon over the entire dish. (If you roll the lemon back and forth a couple of times on the counter with the palm of your hand before cutting it, it will help you get all the juice out.) Pour your wine (or chicken broth) over the top of everything. Give it another big stir to make sure that everything is well coated with the seasonings, lemon juice and wine.

IMG_5279Cover with aluminum foil and bake at 350 degrees for 30 minutes. While it is cooking, chop up of all that yummy feta cheese.

IMG_5280Remove from the oven and spoon over the top of the fresh spinach. You will use the pan juices as your dressing. Top with the feta cheese and enjoy every single bite.

IMG_4749

Posted in Chicken Dishes, Dinner, Gluten-Free, Recipes, Salad, Vegetarian | 2 Comments

Mexican Lasagna

IMG_4443I pretty much love all things Mexican. Really. I mean, I could probably eat Mexican food every single day. The fact that margaritas go so well with Mexican food may or may not have anything to do with that.

On the other hand, I am always trying to come up with different ways to prepare food so that we don’t get sick of eating the same thing all the time. It is so easy to get stuck in a rut with food. There are also many times when I think that I have things in the pantry to fix a certain dish, I get everything out, start cooking, and realize that I do not have everything I need. Instead of panicking, I just change course and throw in what I do have in order to make it work. Sometimes this works out great and sometimes, well, let’s just say it doesn’t. Some of the best things we have around here are a result of those times where I just have to wing it. I honestly feel like those times of trial and error have made me even more comfortable in the kitchen.

Speaking of trials, we all go through them at different points in our lives. Sometimes they are little hurdles that are fairly easy to just hop right over with minimal discomfort, and sometimes they are the kind of hurdles that you go to hop over and you trip, flail in the air, then land only to skid across the ground on your face unable to get up. Those are the times when you hope that either, A.) no one was around to see what just happened to you as you lay there and cry like a baby, or, B.) that whoever was there to see it are the kind of people that will lay down on the concrete and cry with you until you can belly laugh again.

I haven’t blogged for awhile because I have been dealing with some trials, in the form of health issues, for the last 4 months. It’s been a fight between ongoing dental issues and illness, the latest of which has had me confined to my bed for the last 5 days. It is so difficult to have to stay in bed and rest, when I am the kind of person who normally has so much going on I barely take time for a bathroom break. The fact that I have zero energy and can barely make it to the other room without passing out does make it much easier to just do nothing!

To occupy my time in bed, I have watched 1,422 preschool programs, completed 763 puzzles, played 54 games of Candyland and countless hours of snuggle time with my little sweetie girl. Who is over the moon that she has had my undivided attention. Today I decided that to keep my mind from reverting back to a 5 year old, I would catch up on my blogging!

On that really bright note, I have been overwhelmed and inspired by the amount of new followers I have received through email subscriptions and Facebook over the last couple of weeks. You have all encouraged me to get these pictures and recipes up, which in turn, I hope, will inspire you to get in the kitchen and cook up something wonderful!

There is something beautiful about Mexican Lasagna. The best part of this is you really can put anything you want into it. You could even use this as a dish to empty out the pantry, when you haven’t been to the grocery in awhile! I normally make this with chicken, but you can make it with ground beef or even ground turkey. If you’re out of meat, well, then, go veggie! Also, I would normally use black beans, but as you will see in these pictures, all I had was small red beans, so that’s what I used.

*This recipe is gluten free as long as you use a gluten free taco sauce and tortillas.

**For the vegetarian option, just omit the meat.

Mexican Lasagna

  • 4 tablespoons of oil (I prefer, olive, coconut or avocado)
  • 1.5 pounds of boneless, skinless chicken breasts or ground beef
  • 1.5 tablespoons of taco seasoning
  • 8-10 oz jarred taco sauce (I used Old El Paso, it’s gluten free)
  • 1.5 – 2 cups of beans (You can use black, white, red, whatever you prefer or have on hand)
  • 2 cups sweet corn (preferably NON-GMO)
  • 1 medium sweet onion, diced
  • 1.5-2 cups of yellow, red, orange and green sweet peppers, diced
  • 1 – 4.5 oz jar of chopped green chilies
  • 1 jalapeno, diced (optional)
  • salt and pepper, to taste
  • about 10 flour tortillas
  • 1.5 cups shredded Monterrey jack cheese
  • 1.5 cups shredded sharp cheddar cheese
  • black olives, green onions, chopped tomatoes, sour cream, guacamole, salsa for toppings (optional)

Preheat oven to 400°F. Season chicken on both sides generously with salt and pepper and a portion of the taco seasoning. Preheat a large skillet over medium high heat. Add 2 tablespoons of the oil. Add chicken and cook about 3-4 minutes per side, or until chicken is cooked through.

IMG_4434Take the chicken out of the pan and let rest, then cut it into strips about an inch wide and shred it with two forks. Set aside.

In a large, heavy skillet over medium heat, add 2 tablespoons of oil. Add in the onion, peppers, green chilies and jalapeno and cook for about 2 minutes or until softened.

IMG_4432Then stir in your remaining taco seasoning, corn and beans and heat for about 2 minutes.

IMG_4433Add in the shredded chicken and taco sauce and stir well to mix everything together. Heat for about another 2-3 minutes and remove from heat.

Take out your tortillas and, using a pizza cutter or a knife, cut them in half and then in half again, so that you have triangles.

IMG_4435Grease a 13 x 9 baking dish. Take half of the meat/veggie mixture and put it in the bottom of the dish. Add in a layer of the cheeses on top of that.

IMG_4437Then cover that with a layer of tortillas. You will have to sort of fit them in like a puzzle.

IMG_4438Cover that with the remaining meat/veggie mixture and another layer of cheese, then top with another layer of tortillas. Bake lasagna for about 15-20 minutes until cheese is bubbly and mixture is heated through. Remove from oven and top with some more of the shredded cheese and bake for another 5 minutes, or until the cheese on top is melted. Remove from oven and serve. You can top this with black olives, green onions and tomatoes then serve with sour cream, guacamole and salsa.

IMG_4445

Posted in Beef, Chicken Dishes, Dinner, Gluten-Free, Lunch, Mexican Inspired, Recipes, Southwestern Inspired, Vegetarian | Leave a comment

Welcome to all of the newest subscribers!

Recently, on several different blogs and sites, the recipe for this Corn Casserole was posted. Over the last two days my phone has been blowing up with notifications of new likes to my Facebook Page and new email subscriptions here. It has been quite a pleasant surprise for me!

I just wanted to take a minute to welcome all of you to OhMyGoodyGoodness. I appreciate that you have all taken the time to pay me a visit and I hope that you will find some recipes on here that you, your family and friends will love as much as my family and I do. For those of you that are new here, you can visit my About page, to find out a little bit more about me, and why I started this blog.

To all of you who have been following me for the last couple of years, I want to say “hello again” and thank you for sticking with me!

I have had a lot of things going on in my life and I had not posted a new recipe on here since November of last year. Sigh. I didn’t even realize it had been so long until I checked recently. Raising a family, homeschooling a 10th grader, running a business (that has been overwhelmed with work) , and dealing with some continuous and frustrating health issues over the last few months, have made it virtually impossible to find the extra time to get recipes posted.

However, I am determined to make the time to get back to posting delicious eats and some funny stories for your viewing pleasure!

In the meantime, here are a few of our family and friends favorite meals.

This recipe for Bonfire Chili is in our top 10 favorites. It is full of fresh ingredients and is bursting with flavor. Everyone I have ever made it for has loved it, and asked for the recipe.

This recipe for Chicken, Roast Pear, Pecan and Blue Cheese Salad is one of the best things I have ever eaten in my life. It is so fresh and flavorful and the candied pecan topping gives it that extra crunch that just sends it over the edge into flavor town.

Here is one more recipe that we love for Black Bean, Lime, Cilantro Chicken. This is another recipe that is very fresh and full of flavor.

Thanks again for stopping in, I am so happy to have you here and appreciate you taking the time to visit my little blog!


Posted in Uncategorized | 6 Comments

Broccoli and Cauliflower Casserole

Unfortunately, I do not have any pictures to post for you of this dish. As I have mentioned before, I lost a lot of recipe pictures earlier in the year, and these were some of the ones missing. Even though I do not have pictures to show you of the finished product, I still love the recipe so much that I thought it was worth it to put it up anyway! So, you’ll have to use your imagination on this one!

I have been making this recipe for so many years and we love it. Well, everyone except my husband and the picky princess who runs screaming at the mere mention of the word ‘vegetables’. It only has 5 ingredients and is a cinch to put together. It makes a great addition to your Thanksgiving menu.

This recipe came out of a 1977 cookbook from the Woodville Baptist Church in the tiny town of Mitchell, Indiana. When I was growing up, my mom had a best friend, Mary G., who was like a mother to her and a grandmother to me. She lived in Mitchell and we used to make the drive up from Evansville to go visit her quite often when I was a little girl. She was always cooking and canning something and she always let me in the kitchen to help. To this day I still cherish the times I got to spend with her. She always made me feel special and like I was the only one in the world she had to spend time with while I was there. This is the only recipe book that I have kept over the years, and I don’t think I could ever part with it.

**This recipe can be gluten free if you substitute a gluten free cream of mushroom soup and the fried onion topping. I have seen the Funyuns snack used as a gluten free substitute for the topping on many casseroles, or you can make your own fried onions.

Broccoli Cauliflower Casserole

  • 2 bags frozen broccoli and cauliflower mix (usually 10-12 oz bags), thawed and drained
  • 1 can cream of mushroom soup
  • 6 – 8 oz. canned milk (this is not sweetened condensed milk, it is evaporated milk)
  • 8 oz sharp cheddar, shredded
  • large can of French’s fried onion rings

Place thawed veggies in an oven safe casserole dish. You can use a 9 x 13 one, or use the 12 3/4 x 10 3/8 aluminum throw away pans, like I do.  Blend soup, milk and cheddar cheese in a sauce pan until heated through and well blended. Pour this mixture over the veggies and bake at 350 degrees for 25 minutes. Remove from the oven and sprinkle the fried onions evenly over veggies and bake for about 5 minutes more or just until onions are browned and crispy.

Posted in Cheese, Dinner, Gluten-Free, Lunch, Recipes, Sides, Vegetables, Vegetarian | 4 Comments

Coconut Sweet Potato Casserole

Last year around the end of October, I had made a few sweet potatoes and added in a half a can of coconut milk that I had leftover. OhMyGoodyGoodness, it was amazing. The way the sweet potatoes blended with the coconut milk were seriously delicious. A few days later, I got a new email from Jessica over at How Sweet Eats with this recipe for Lightened up Sweet Potato Casserole, which blended sweet potatoes and coconut milk. I thought that recipe would be a great addition for my Thanksgiving menu last year, and it was truly a hit with everyone. Even the kids liked it! I am definitely making it again this year for turkey day.

I changed up her recipe just slightly because I am not a huge fan of maple syrup and I didn’t have wheat pastry flour. Instead I added some crushed pineapple to the recipe which gave it nice sweet tangy flavor. This recipe is amazing and has a delicious coconut pecan topping. It is by far the best sweet potato casserole I have ever had. Like I have been saying a lot this week, if your looking for something a little different to add to your Thanksgiving menu next week, this one’s for you!

I made this the day before, covered it in foil and stored it in the refrigerator until I was ready for it on Thanksgiving Day.

**This is gluten free if you substitute a gluten free all purpose baking flour and gluten free oats.

Coconut Sweet Potato Casserole

For the Sweet Potatoes:

  • 2 pounds sweet potatoes, peeled and cubed (about 4 large potatoes)
  • 2 tablespoons brown sugar
  • 1/3 cup crushed pineapple
  • 1/3 cup canned coconut milk
  • 2 teaspoons vanilla extract
  • 1/2 teaspoon cinnamon
  • 1/4 teaspoon nutmeg
  • 1/4 teaspoon salt
  • 3 tablespoons butter, softened

Peel and chop sweet potatoes into 1 1/2 inch cubes. Add potatoes to a pot and fill with cold water, then bring it to a boil. Cook until potatoes are fork tender, about 20 minutes or so, then drain.

To the bowl of an electric mixer (or a large bowl, using a hand mixer), add sweet potatoes. Add all of the remaining ingredients – sugar, pineapple, spices, salt, vanilla extract, coconut milk and butter – and mix on low speed until combined; then on medium speed for another 1-2 minutes, until potatoes are whipped. Spread in an oven-safe pan or dish. I used a 12 3/4″ x 10 3/8″ aluminum casserole pan and it was the perfect size. I always use those for Thanksgiving so that I can toss them out (into the recycle bin) later.

Oatmeal Coconut Pecan Crumble Topping

  • 1/2 cup whole pecans, chopped
  • 1 1/2 tablespoons brown sugar
  • 1/4 cup flaked coconut
  • 1 tablespoon flour
  • 1/4 cup old-fashioned oats
  • 1/2 teaspoon cinnamon
  • pinch of nutmeg
  • pinch of salt
  • 2 tablespoons butter, softened
  • 1 – 1.5 cups mini marshmallows

Combine oats, flour, pecans, coconut, spices and salt in a bowl and mix to combine. Add in the butter, and use your hands to completely moisten the mixture and combine it together. I chose to make a row of this crumbly mixture and then a row of mini marshmallows.

Bake at 375 degrees for 20-25 minutes, or until crumble is golden and marshmallows are gooey.

Posted in Appetizers, Dessert, Dinner, Gluten-Free, Lunch, Recipes, Sides, Toppings, Vegetables, Vegetarian | 6 Comments

Cream Cheese Stuffed Cranberry Sauce

Two years ago I found this recipe in a holiday magazine I was reading. I wrote the recipe down, but I never wrote down where it came from. This was back before I was blogging about food and started keeping track of where I got every recipe. I thought it was a great idea and a nice little change up from regular old cranberry sauce.

Turns out, they were really delicious and everyone loved them. They are really easy to put together and work great as an appetizer or a compliment to the main meal. If you want to switch things up a little bit this Thanksgiving, you should give these a try.

Cream Cheese Stuffed Cranberry Sauce

  • 1 – 8 oz package cream cheese, softened
  • 2 tbsp Duke’s Mayonnaise
  • ½ cup chopped pecans
  • 2 – 14 oz cans of cranberry jelly sauce

Mix cream cheese and mayonnaise until smooth and creamy. It needs to be spreadable. Add in the pecans and mix well. Slice cranberry sauce into about ¼ inch rounds. Then spread the cream cheese mixture on 1 round, like this

And then place another round on the top, like a sandwhich.

I usually cut the rounds in half. You can refrigerate until you are ready to use them.

Posted in Appetizers, Cheese, Dessert, Dinner, Dips and Spreads, Gluten-Free, Lunch, Recipes, Sides, Snacks, Vegetarian | 2 Comments

Pumpkin Pie Squares

If you are looking for something a little different than boring old pumpkin pie to fix this Thanksgiving, this one’s for you! I found this recipe about 14 years ago in a Pampered Chef recipe book and I have been making it ever since. This is truly a family favorite and a must have on our Thanksgiving Day menu. My mom even asks for these for her birthday every year instead of cake!

Now, don’t get me wrong, I love regular pumpkin pie too, but these just have a little bit different dimension of flavor with the pecan and oats crust. They are really easy to make, but you do need to have a special pan to bake them in. The one in my pictures that I use is the Large Stoneware Bar Pan from Pampered Chef. I have had two of these over the years and use it frequently. If you don’t have one of these, you might be able to use a baking sheet. The dimensions of this pan are 15.5″ x 10″, but the key is that it is 1 inch deep. I also use this pan for Apple Pie Squares, which I will have to post the recipe for as well.

**This recipe could be Gluten Free if you use GF oats and a GF baking mix. I use the Arrowhead Mills Gluten Free All-Purpose Baking Mix.

Pumpkin Pie Squares

  • 1 ¼ cups all-purpose flour
  • ¾ cup quick or old fashioned oats
  • ½ cup packed brown sugar
  • ½ cup pecans, chopped
  • 2/3 cup butter, melted
  • 4 eggs
  • 2 cans solid pack pumpkin or 1 large can
  • 2 cans sweetened condensed milk
  • 2 tsp ground cinnamon
  • ½ tsp ground nutmeg
  • 1 tsp salt
  • frozen whipped topping and pecan halves, optional

Combine flour, oats, brown sugar and chopped pecans. Pour in melted butter and mix until well combined. Press mixture flat onto bottom of bar pan. Bake 15 minutes at 350.

While you are waiting on the crust to bake, whisk eggs together in a large bowl. Then add in your pumpkin, condensed milk, spices and salt.

Whisk this mixture together until completely smooth.

Once your crust is out of the oven, pour the pumpkin pie mixture over crust and smooth it out the best you can over the top.

Then just bake at 350 degrees for 30-35 minutes or until filling is set. Remove from oven and let cool completely and then cut into squares. You can add pecan halves to each square and top with whipped topping…

Or, if you want to get really fancy, you can make a candied pecan topping like the one in THIS recipe (just chop up the pecans), and then add those to the top…

Posted in Candy, Dessert, Gluten-Free, Recipes, Sides, Snacks, Toppings, Vegetarian | 5 Comments