White Gravy

If you would have told me 20 years ago that I would be a married, stay-at-home, home school mom of two and writer a cooking blog, well, I probably would have rolled on the floor laughing hysterically…for quite a long time. Especially about the cooking part. You see, I was never the domesticated type back then. In fact, I laughed in the face of domesticity.

For years I could only cook eggs, toast and white gravy. I don’t even know how I learned to make the gravy or why that was something I even wanted to make. But, I used to eat it as a snack on white toast after school. I love gravy and especially with a lot of fresh ground pepper in it.

When I started to do this blog, one of the hardest things about it was actually measuring things out so that I could share the exact recipes with you. I have never been one to measure anything, I just throw in a little of this and a little of that until it tastes good. This recipe I had never actually measured before, but this is what I came up with for you.

This gravy is what I serve over this Breakfast Casserole. This makes just enough for each serving. You can easily double this recipe if you need to.

** For the Gluten Free version, just us an all-purpose GF flour.

White Gravy

  • 5 tbsp butter
  • 4 tbsp flour
  • Salt
  • Pepper
  • 2 ½ cups of milk

Melt butter in a saucepan over medium heat and add your salt and pepper. You can add whatever amount of those you like.

Add in your flour and whisk until combined.

Then add the milk very slowly, while whisking constantly, until well blended.

Cook for about 8-10 more minutes. Make sure you are whisking about every 2 minutes during cooking to ensure that the gravy is smooth and doesn’t stick to the bottom of the pan.

I use this same recipe and add in cooked, crumbled sausage to serve over fresh biscuits. It is delicious!

Posted in Breakfast, Gluten-Free, Recipes, Sauces, Vegetarian | 4 Comments

Bonfire Chili

A week or so ago my long time friend, Tracy M. from Indiana, sent me a message asking me if I had a good white chili recipe. To be completely honest, I had no idea what white chili was, but I was definitely up for the challenge of finding her a great recipe! I did some research on the internet and tried to figure out what I thought would be the perfect recipe, once I realized what it was. I guess normally a white chili wouldn’t have dark beans, but I liked the idea of the flavor combination of the black and white beans together. Especially since the rest of the ingredients were leaning towards a southwestern feel. She wanted me to try it out first and see how it was, and since we were having a dinner party on Saturday night, it was the perfect opportunity.

When I was trying to explain this “white chili” recipe to my husband he kept saying, “Well, I don’t know, I am not sure I would like that. I mean, it sounds like a chowder or something.”

“WHAT? A chowder?” Then I looked up and realized that he was playing a video game while I was trying to explain this recipe to him. Ahhh, I understand now. “Yea, babe, it’s a chowder and it has monkey fur in it too, it’s all the rage.”

“I don’t know, I mean, I guess you would just have to make it and we would just have to try it.”

“Yea, ok babe, I will do that. Watch out for that zombie!”

Once I got this made, I am pretty sure he had 3 bowls that night. He loved it. He said that he really thought I was describing something totally different. (It happens when your only half-focused!) He even sent me a text saying how awesome of a cook I was! All over some monkey chowder….Err, I mean, Bonfire Chili. I was just going to call this black and white chili, but everyone here decided they wanted to call it something else. So, since we were having another bonfire that night, this is what they decided to call the chili. This recipe really was a hit with everyone, I was very pleased with how great this turned out. It was so good that I was wishing I had the ingredients to make another big pot of it on Sunday.

You can really kick up the heat in this recipe if you want to. I used mild Rotel tomatoes and about half a jalapeno and the flavor was amazing, without being too hot. You can use the original Rotel with a whole jalapeno and even throw in some red pepper flakes if you want to really kick it up a notch.

** This whole recipe is Gluten Free using the Better Than Bouillon for the chicken broth. If you do not have that product, just use another gluten free broth of your choice.

** This recipe can also be made vegetarian by using vegetable broth and omitting the chicken.

Even though it may seem like extra work, you have to make the fried corn tortilla chips to go with this. It really does take this chili over the top. The crunch was a perfect match. It really only took me about 10 minutes to fry the strips up and I did it during the last few minutes of cooking time on the soup.

This recipe will easily feed 8-10 people. I am sure that leftovers would freeze up great to be saved for another meal if you are not feeding that many.

Bonfire Chili

  • 2 tbsp oil (I used avocado)
  • 1 medium sweet onion, chopped
  • ½ red pepper, seeded and chopped
  • ½ yellow pepper, seeded and chopped
  • ½ green pepper, seeded and chopped
  • 2 tsp minced garlic
  • 2 – 4 oz cans of chopped, green chili’s
  • 3 cans black beans, drained and rinsed
  • 3 cans white beans, drained and rinsed
  • 2 cans Rotel tomatoes, un-drained
  • 1 pound of cooked chicken, shredded
  • 6 tomatillos, chopped
  • 1 Jalapeño, seeded and minced (optional)
  • 1 ½ tsp cumin
  • 1 ½ tsp chili powder
  • ¼ cup chopped cilantro, more if you like (I probably used 1/2 cup)
  • Juice of one lime
  • Salt and pepper, to taste
  • 3 cups chicken broth, use more or less depending on how thick you like your chili
  • Optional for topping: Fried tortilla strips, Monterrey jack cheese, sour cream,  guacamole
  • Corn tortillas, about half of a package
  • oil for frying
  • salt

Cut up all your veggies so that they are about the same size.

I had never cooked with the tomatillos before making this soup. They have a thin outside covering, sort of like an onion, and they were sticky once I took off that covering. I scrubbed them really good (like I do all my veggies) and then gave them a good chop.

In a large soup pot, heat 2 tbsp oil over medium heat. While it is heating up put in cumin, salt, pepper, chili powder and minced garlic. Add in onion, red, yellow and green peppers, and jalapeño and cook for about 3-4 minutes, until they soften up. Add in chopped tomatillos, cilantro, lime juice, 2 cans of chopped green chili’s and 2 cans of Rotel tomatoes. Sauté for about 6 minutes, stirring occasionally, until they are softened. Add in all of your beans and chicken broth and stir so that everything is combined. Cover and let simmer on low heat for about an hour. I checked this about half way through, giving it a stir and checking to see if the seasonings were ok. You should check it just to make sure you don’t need more seasonings for your taste.

I always cook my chicken separate when I am making soups. I can’t stand to eat boiled chicken for some reason. I cooked this in a large skillet in some oil and seasoned it with salt, pepper, cumin and chili powder. Once it was cooked I took it out and shredded it with two forks and then just gave the shreds a rough chop.

I put the chicken in with the soup after the soup had simmered for about an hour, then I let it cook for about another 10 minutes.

When the soup is just about finished, take out your corn tortillas. I used these:

I used about half of this package. Cut the rounds in half and then cut the halves into strips.

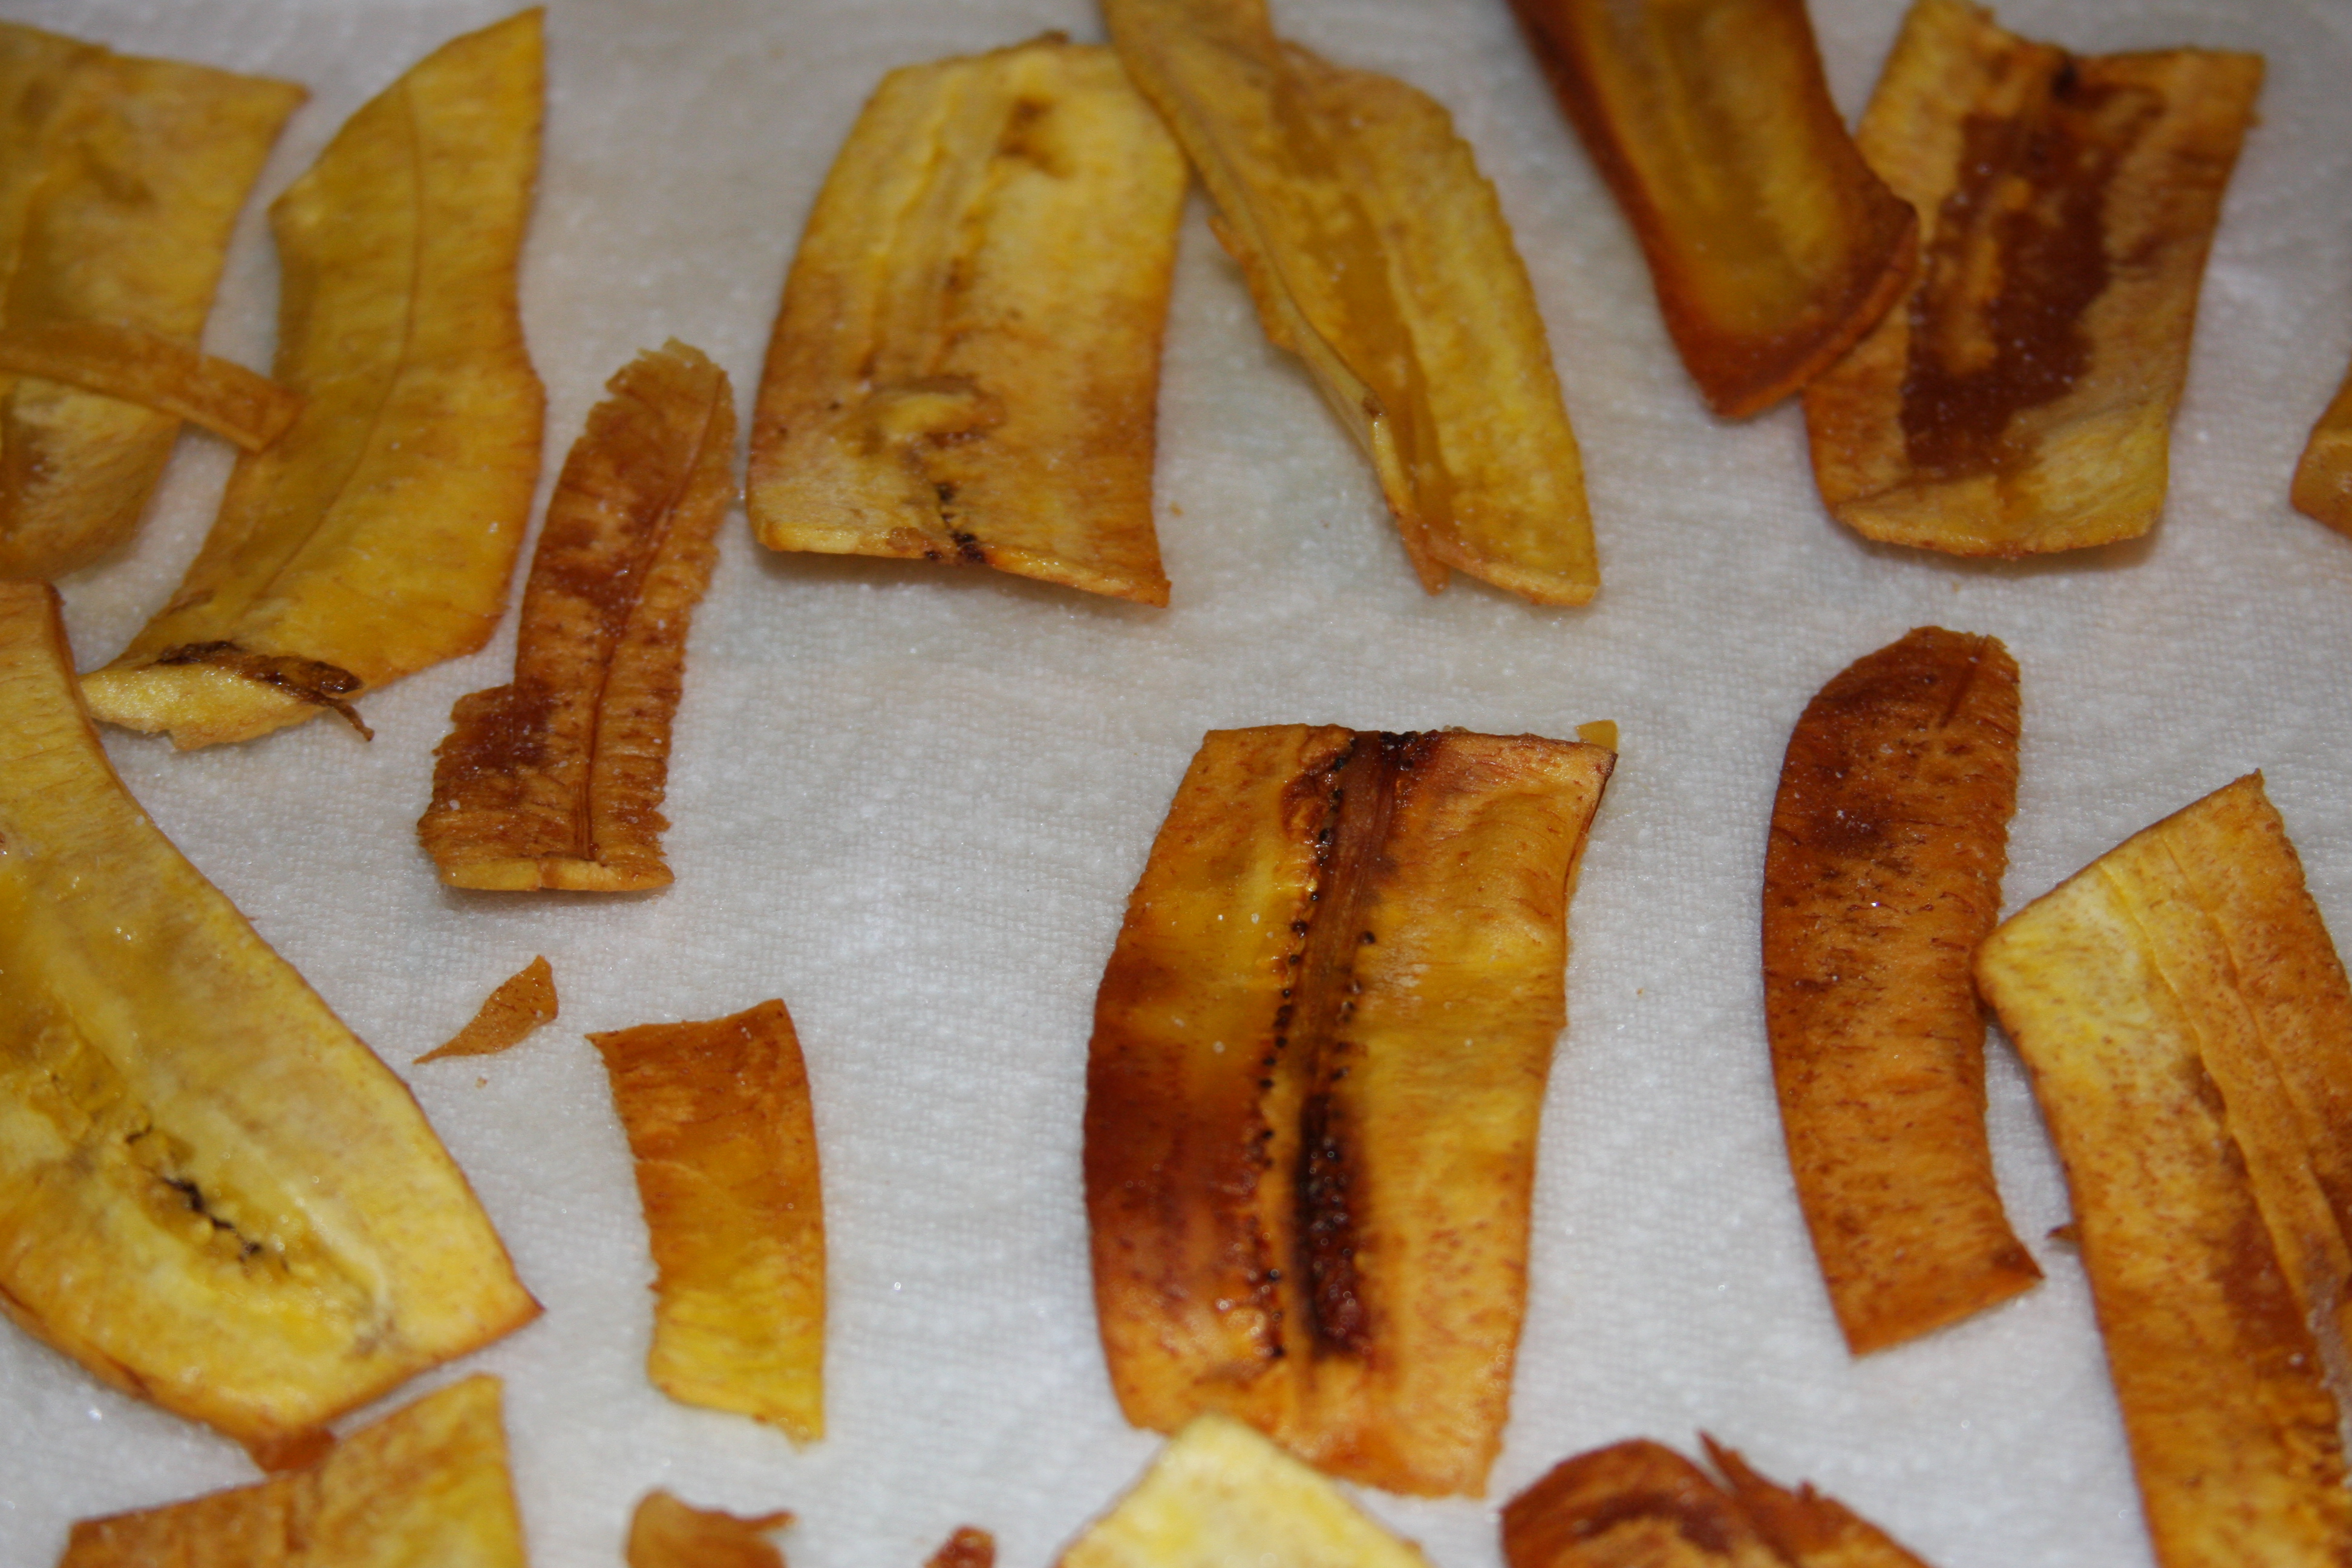
Heat up your oil (I used avocado oil again, but you can use whatever kind you like) in a large skillet and fry these strips until they are nice and crispy.

Drain them on paper towels and sprinkle them with a little salt. Set them aside so you can top your chili with them. I was so tempted to just sit and eat them right off of this plate, they were so good!

I really hope that you enjoy this soup as much as we did. I can see this chili being a regular addition to our meals around here!

Posted in Chicken Dishes, Dinner, Gluten-Free, Recipes, Soup, Vegetarian | 2 Comments

Fried Plantains and Fresh Guacamole

Last weekend we had over our usual crew of friends for some food and as always, a few laughs. We try to get together every Saturday night if we can. I cook up some random recipes and they eat! I like to think of them as my “test subjects” because they always try out my new recipes and then let me know if their good or not.

I recently started to use more Grapeseed and Avocado oils to fry in since they are more healthy, and I think better tasting, than other oils. They are more expensive, but if you clean out the oil and store it in mason jars, you can reuse it and make it last longer.

I used this Avocado Oil (which has to be refrigerated once opened).

We were all shocked at how great the flavor of these plantain chips were. They were absolutely non-greasy, they didn’t even taste like they had been fried and they had a very clean flavor and taste to them. I saved the leftovers in a Ziploc bag and ate them the next day for a snack.

For the fried plantains you will need about 4 plantains, salt and enough oil to fill your skillet about 2 inches deep. Plantains are not quite as easy to peel as a banana, so this is the easiest way I found the prep them so that you can get all of the peel off.

Lay out the banana and cut off just below the tip on each side.

Then take your knife and, without cutting into the flesh of the fruit, make a slit down the length of the banana. Then peel off one side and then the other.

Cut the plantain in half and then your going to run it through a mandolin.

If you do not have a mandolin, you can use a knife. You just need to make sure that your slices are exactly the same width so that they cook evenly.

Once you have got them all cut, heat up the oil in your skillet to about 350 degrees. Drop in as many slices as you can fit in the skillet at once. Cook them for about 2-3 minutes per side, or until they as crispy as you want them.

Once they have finished frying, transfer them to paper towels and immediately salt them.


Fresh Guacamole

  • 3 avocados
  • 1 cup red onion, diced
  • 1 medium tomato, diced
  • 1/4 – 1/2 cup cilantro, chopped (depending on your taste)
  • 1/2 lime, juiced
  • salt and pepper, to taste

Take your avocado and lat it out on a cutting board. Then take your knife and for a minute pretend you are a ninja. Come on, you know you do this in secret from time to time…or, wait, maybe that is just me. Anyway, hold the avocado in one hand and take the knife in the other and slice it all the way around the whole avocado.

Then take your fingers on both sides of the cut and it should easy come right open into two pieces.

Then bust out your ninja skills again for a second. Your going to take the knife and smack it down into the seed of the avocado with a swift motion, so that the knife sticks in the seed and you can pop it right out.

Then just take a spoon and insert it right between the skin and the flesh and just scoop the flesh right out of there.

Put the avocado in a bowl and you can mash it up with a fork to whatever consistency you prefer. I normally use my pastry blender for this, it just seems easier to me than using a fork.

Once you get that mashed up, add the rest of the ingredients and stir until it is completely combined. Give it a taste and see if you need more salt.

You can serve this with these plantains, tortilla chips or even use it on your favorite tacos or fajitas.

Posted in Appetizers, Dips and Spreads, Gluten-Free, Products, Recipes, Snacks, Tips and Tricks, Vegetarian | 4 Comments

Roasted Red Pepper & Garlic Cream Sauce

I will tell you another secret about me. When it comes to cooking and preparing foods I am never going to be one to make my own beef or chicken stock or roast my own vegetables, unless they are being used right then with dinner. Even though I am sure both of those are much better when done yourself, it’s just not gonna happen here. I don’t even use regular cloves of garlic, just minced from the jar. It’s sad, I know, but I just don’t have the time for it. Honestly, people, it is sheer magic how I can even write these blog posts. Yesterday when I wrote about the Goat Cheese Appetizer, I was in my daughters bed covered with about 25 different plastic plates and dishes filled with plastic food, trying to keep her quiet so my son could finish his Algebra I.  I could barely raise my arms to squeeze out my fingers and type the recipe I was under so much stuff. We could have filmed a movie, Attack of the Plastic Kitchen Food.

You see, I put up all the nice 1950’s inspired pictures on here because that is how I pretend I look every day. If I posted the pictures of reality, well, you may never come back and visit this page even if you like the recipes! Although I do try to have on regular clothes (not my pajamas), have make up on and my hair half way done at least a few days a week. You know, so that my husband remembers who he married!

And then some days I make myself look like a crazy wild maniac so that when he returns from that place he calls “work” he feels really sorry for me and lets me out of this place! That is when I get to pretend to be an international woman of mystery and go out with my BFF for mani-pedi’s, wine and cheese and adult conversation. Oh, how I cherish those times!

Ok, back to the reason your here. I made these Wow Wow Wonton Ravioli’s again last night. I still used the spinach and shallot, only I changed up the cheese blend to Cheddar, Fontina, Gouda and Parmesan/Romano. Oh. My. Goody. Goodness. They. Were. Good.

I was not in the mood for having them with olive oil and I could not bare to eat another tomato sauce, so I looked around in the fridge to see what I could come up with.  Holy Moly, this turned out to be an amazing sauce and it was fabulous over the ravioli. You definitely have to try this combination.


Roasted Red Pepper & Garlic Cream Sauce

  • 1 whole roasted red pepper, diced
  • 2 ½ tbsp butter
  • 2 tsp minced garlic (if you don’t like to cheat like me, 4 cloves garlic, minced)
  • 4 oz cream cheese, cut into chunks
  • 1 ¼ cups heavy cream
  • salt and pepper, to taste

In a saucepan over medium heat, add your salt and pepper and butter.

When the butter melts, add in your garlic and sauté for 1 minute.

Then add in your roasted red pepper, stir, and let that simmer for about 2-3 minutes.

Add in chunks of cream cheese and stir.

Slowly pour in heavy cream while whisking sauce.

Continue to whisk sauce until cream cheese is melted. Reduce heat to low and simmer for about 5 minutes, whisking about half way through.

You can use this sauce with whatever your heart desires. Pasta, chicken, you could even make some bread sticks and use this as a dipping sauce. The possibilities are endless!

Posted in Cheese, Gluten-Free, Recipes, Sauces, Vegetarian | Leave a comment

Goat Cheese in Tomato Cream Sauce

Back in September I had the honor of celebrating my cousin’s birthday on a fun girls night out to the Dessert Lady in downtown Orlando. I will get to that in a minute, but first let’s talk fashion. My cousin Lindsay and her BFF Jennifer are total fashionistas. I really wish that I could be one of the cool kids like them when it comes to dressing, but for now I just pretend to be. These girls share in my love of thrift store shopping and have shared with me all their favorite places to shop, for which I am truly grateful. If you love fashion and want to find some things you won’t be able to find anywhere else, you should definitely check out their new online store. It’s like a clothing/jewelry thrift store, only online and without the grunge and odd characters. You can also find them on Facebook – Skunky Munky, LLC, like their page so that you will be notified each time they add new products.

Ok, back to the Dessert Lady. If you live in Central Florida and you love dessert, you really must check it out. I am pretty sure they were the best cakes I have ever had. The dessert menu is unreal and the portion sizes are ridiculously large. We had a 4 piece sampler dessert platter, which consists of half size pieces, and we still couldn’t finish it between the four of us!

We also shared a couple of appetizers. One of them was this tomato cream sauce with goat cheese served with toasty bread. It was so amazing, we all loved it. I knew that I was going to have to re-create this at home.

You could easily use a pre-made jar of sauce if you wanted to, even a vodka cream sauce would be great with this. However, this tomato sauce recipe is quite simple to make, and only a few ingredients. I made this a second time and served it over baked chicken with a side of pasta. It was lovely.

** The appetizer is Gluten Free, just serve with your favorite GF bread or tortilla chips.

Goat Cheese with Tomato Cream Sauce

  •  8 oz goat cheese
  • 1 shallot, diced
  • 1 tbsp olive oil
  • 28 oz can crushed tomatoes
  • 1 cup heavy cream
  • salt and pepper, to taste
  • loaf of crusty bread or tortilla chips

I found this goat cheese on a recent trip to my local Sam’s Club, it has such a wonderful creamy flavor. I used half of this for the recipe.

Heat olive oil over medium heat in a large skillet and then add the shallot. Cook for about 2 minutes. Add the can of tomatoes and let simmer for about 10 minutes or until it has thickened up, stirring occasionally. Add the heavy cream and salt and pepper, mix well and let cook for another 4 minutes. Pour half of this mixture in the bottom of a baking dish. Crumble goat cheese evenly over the tomato sauce like this:

Then pour the remaining sauce over the top. Bake at 350° for about 12-15 minutes or until hot and bubbly. Serve with slices of your favorite toasted bread. I used sesame French bread. I cut them into 1 inch slices, buttered them and baked them at the same temperature for about 8-10 minutes. You could also use tortilla chips or baked pita chips.

Posted in Appetizers, Cheese, Dips and Spreads, Gluten-Free, Recipes, Vegetarian | 5 Comments

Pumpkin Spice Latte

I was looking around on one of my favorite websites the other day, Tastespotting, and came across this recipe from Recipe Girl for a copy cat Starbucks Pumpkin Spice Latte.

Since I am trapped in this zoo of a place I live all the time and I never get out to see the outside world and experience such places like Starbucks, I thought this recipe must be the best thing since sliced bread. Did you know that they actually did not start slicing bread until 1928? A man named Otto Fredrick Rohwedder made the machine that could do it. It would have been done in 1912, but the prototype was destroyed in a fire. I know this because my ADD brain just took me on a little history lesson.

Ok, back the real reason I am writing this. I hear all my friends, who have a life and get to get out of their house and go to fancy places like Starbucks, talking about these pumpkin latte’s and how great they are. Blah, blah, blah, is all I really hear. While I sit here in my pajamas while the dogs are barking, the kids are running wild and my husband has left me in this madness once again to go to that place he calls “work,” thinking about what it must be like to get dressed up and go into the big city with my girlfriends and order fancy tall coffee’s at Starbucks and have 2 hours of uninterrupted conversation. It must be like a little piece of heaven…

Ok, really, this time I am getting right to the recipe. This is straight from the Recipe Girl blog, I didn’t change a thing. If you want step by step pictures, you can use the link above to view hers.

Pumpkin Spice Latte

Do It Yourself version of Starbuck’s delicious Pumpkin Spice Latte…

  • 1/2 cup whole milk
  • 1 tablespoon unsweetened canned pumpkin puree
  • 1 teaspoon packed light brown sugar
  • 1/4 teaspoon pumpkin pie spice
  • 1 teaspoon vanilla extract
  • 1 cup hot brewed, strong coffee
  • 2 tablespoons half & half cream
  • 1 teaspoon granulated white sugar, or more to taste
  • whipped cream, optional
  • ground nutmeg

In a glass measuring cup or microwave-safe bowl, whisk together milk, pumpkin, brown sugar, spice and vanilla. Microwave for 1 to 2 minutes- watch closely and remove it from the microwave when the milk is hot and frothy.

Pour the pumpkin milk into a tall mug or glass. Add hot coffee. Pour in the cream. Add a teaspoon of sugar. Stir, and taste. Add more sugar, if desired.

Optional, but oh so good… add whipped cream on top and a sprinkle of nutmeg. Serve immediately!

*Feel free to lighten up the recipe by using nonfat milk and fat-free half & half. It won’t be as rich, but it will still give you that yummy pumpkin latte flavor.

*If you don’t have pumpkin pie spice in your collection of spices, make your own! Mix equal parts of cinnamon, ginger, allspice and nutmeg- and measure from there.


Posted in Drinks, Gluten-Free, Recipes, Vegetarian | 5 Comments

Vance’s Breakfast Casserole

I will tell you a secret. I really don’t like making breakfast. I don’t know why. Well, yes I do. I hate mornings. I really dislike everything about them except for the coffee. In fact, pretty much everyone I live with knows that they probably just shouldn’t talk to or ask too many questions of this 1950’s woman of glamor before I have had my coffee in the morning.

I have always been a night owl and I just prefer to stay up late and sleep late. It is actually why I home school my kids. You know, so I don’t have to get up and get kids ready for school before the sun is up. OMG! You know, making peanut butter and jelly sandwiches and filling lunch boxes, cleaning eye boogies, teeth brushing, arguments over which outfit they are wearing, rushing down the street for the bus in my housecoat and ruining my image. That. Would. Be. Torture. For. Me.

I am kidding about why I home school. Or am I?

Anyway, back to the food. I wish I could remember where I got this recipe. I have been making it for our family for as long as I can remember. It is really quite easy and delicious. You can easily make a double batch if you have a lot of people to feed.

The beauty of this dish is that you really can put anything you want in it. You can kick it up southwest style and use bacon, add some red pepper flakes, chopped green onions, chopped tomatoes, etc. and instead of gravy, top it with sour cream and guacamole. In fact, that sounds like a great idea! I think I will make that soon.

** For the vegetarian version, just leave out the meat.

Vance’s Breakfast Casserole

  • 1 package Grand’s biscuits (8) – or whatever your favorite ones are
  • 7 eggs, whisked
  • ½ cup cooked, crumbled bacon
  • ½ cup cooked, crumbled sausage
  • ½ cup shredded cheddar cheese, or more if your cheese crazy like us
  • Butter or cooking spray
  • Salt and pepper, to taste

Serve with this White Gravy.

Grease the bottom and sides of a 13 x 9 baking dish. Place biscuits evenly in the pan with some space in between each one.

Pour over the egg mixture, bacon, sausage and cheese. Sprinkle with salt and pepper (as much or as little as you like).

Bake according to the package directions for the biscuits. Just check to make sure that your eggs are all the way cooked in the middle of the dish. Serve with gravy.

I hope you enjoy this as much as we do and if you add different ingredients, I would love to hear about it!

Posted in Bacon, Breakfast, Cheese, Recipes, Vegetarian | 4 Comments

Cheese, glorious cheese

This week while shopping at my local wholesale club, a place I frequent faithfully every two weeks, I went a little cheese crazy. I bought these giant chunks of Gouda, Fontina and Bruschetta Jack. My local grocery store carries quite a few options when it comes to cheese, but for the price, I really can’t beat the wholesale club.

We love cheese around this house and recently have been trying some new flavors as they have increased the options where I shop.

For this hunk of burning love…

I am going to try out a recipe for cheese grits from another blog I follow.

For this slice of creamy, sweet, nutty, goodness…

I am going to make a copy cat recipe of the Pollo Rosa Maria from Carrabbas Italian restaurant. I have made it once before and my husband said it was in the top 10 best meals he had ever eaten in his life. Which was pretty amazing since that dish from Carrabbas is the only thing he has ever eaten in that restaurant.

We rarely go out to eat, but when we do and we find something we really love, it becomes a challenge for me to try and recreate it at home.

For this intriguing little number here…

I really have no idea what I am going to make. It looked pretty amazing and I am sure it will be very satisfying on some gourmet crackers, but I know that it is also an amazing recipe waiting to happen.

I would love to hear from you if you have any suggestions for me on what to make with the Bruschetta Jack. In fact, if you have something in mind and want to do a guest spot on this blog with your recipe, that would be even better! If you have an interest in that, you can contact me via the Facebook Page or email me at ohmygoodygoodness@gmail.com.

I look forward to hearing some suggestions.

Posted in Cheese | 2 Comments

Quarterback Chicken Sliders

I have always called these tiny sandwiches Buffalo Chicken Sliders, but over the weekend we decided to change the name to Quarterback Chicken Sliders. First, because they are perfect game day food and who doesn’t like a quarterback? Second, because the more I thought about it, I realized you can make these with just about any of your favorite sauces.  Buffalo, Barbeque, Sweet and Sour, Lime-Ginger, Tonkatsu (for an Asian flare), just to name a few of the ones I think would be great for these. The following recipe is for the buffalo sauce option, but you would just follow the same directions, substituting the sauce for something different.

They are very easy to make and can be served up alongside any of your other favorite game day foods. These ‘tiny sandwiches of goodness’ get rave reviews around my house and are asked for again and again. I hope you will try them and love them too.

** To make these Gluten-free you can eliminate the flour altogether and only use the Corn Starch in your batter; or you can use something like Bob’s Red Mill A/P Flour, which can be found in a lot of grocery or health food stores. Whole Foods also carries a variety of gluten free buns, or you can eat the chicken by itself and forget the buns altogether. Texas Pete’s Wing Sauce is also Gluten-free.

Quarterback Chicken Sliders

  • oil, for frying
  • 3 eggs
  • 1/2 cup buffalo wing sauce (we love Texas Pete’s), plus more for topping sandwiches
  • 4 boneless, skinless chicken breasts (I cut these like I am going to butterfly them, but just cut them all the way through so that each piece is not very thick and they cook more evenly. You will end up with 8 breast pieces)
  • salt and black pepper, you can add what you want according to your taste
  • 1 1/2 cups flour
  • 3/4 cup corn starch
  • 24 small buns, you can use any kind you prefer, fresh are better (I have used fresh dinner rolls, water rolls or Kings Hawaiian Rolls)
  • Blue Cheese dressing (or Ranch if you prefer)
  • Optional ingredients: blue cheese crumbles, tomato slices, lettuce, celery, pickles

If you aren’t cooking for a big crowd, you could cut the recipe in half. This yields 24.

Cut the chicken breasts into thirds. I can usually get about 3 pieces out of each breast I use so I end up with 24 pieces.

In a medium-size bowl, using a whisk, beat the eggs with the hot sauce until well blended. In another medium bowl, mix the flour, corn starch, and salt and pepper until well combined (I use a whisk for this too). Dip the chicken in the egg mixture and then into the flour mixture. Then repeat this step again so that your chicken has a nice thick coating on it.

In a deep-fryer or heavy-bottomed pot, heat enough oil to come halfway up the sides of the pot, to 350 degrees F. Fry the chicken for about 3-4 minutes per side, or until juice is clear and chicken is cooked through.

Remove chicken from pan/deep fryer and let drain on a paper towel lined plate. Put the chicken on the buns and then top with crumbled blue cheese, blue cheese dressing, lettuce tomato, pickles…whatever your heart desires!

This time we served them up with Black Bean Salsa served in Scoops and with celery and blue cheese dressing.

Posted in Appetizers, Chicken Dishes, Dinner, Gluten-Free, Recipes | 1 Comment

Sweet and Salty Green Beans

These green beans are such a favorite in our house that my mother won’t even eat green beans anymore unless they are cooked this way! They are a great mix of sweet (from a little sugar) and salty (from the bacon) and I think you are going to love them! They are super simple to make and if your bacon is done ahead of time, only take about 15-20 minutes. They are a perfect side dish and can be cooked along side of whatever the main course is.

** If you are a vegetarian you can substitute pork bacon with something like this Veggie Bacon

** If you are on a gluten free diet you can substitute the processed bacon (sodium nitrates=bad for those with Celiac Disease) for something like one of these Hormel gluten free bacon products.

Both of these substitutes can be found in most of your local grocery stores.

Sweet and Salty Green Beans

  •  ½ small sweet onion, finely diced or you can use 1 large shallot, finely diced (you want about 1/4 cup)
  • 1 1/2- 2 pounds fresh green beans, washed, drained and ends trimmed
  • 1 cup of bacon, chopped (or more if you really love it)
  • 3 tbsp bacon grease – or if you have leftover bacon and no grease, you can use 1 tbsp butter and 2 tbsp olive oil
  • 1 tbsp sugar

Heat bacon grease (or oil and butter) in a skillet over medium heat until hot. Then add onion and sauté for about 3-4 minutes. Add 1/4 of the bacon to the pan and cook for another 2 minutes. Add all of the green beans and sprinkle on half of the sugar and keep stirring until all of the beans have been coated, about two minutes. Add about 1 cup of water, cover and simmer for about 12 minutes, stirring about half way through. Check to make sure the water doesn’t completely evaporate before time is up. If it does, just add a little more water.  Remove lid and sprinkle over remaining sugar and stir well, cooking uncovered for about 2-3 more minutes. Then add remaining bacon and stir. Let cook for about another 2-3 minutes without lid. Stir well and serve.

Posted in Bacon, Gluten-Free, Recipes, Sides, Vegetarian | 4 Comments